This lesson is very easy, web masters, even beginners, will not need it, since making a link and making a picture a link are the basics of HTML, but for bloggers who are taking their first steps, I am sure this topic will be useful.
Bloggers are often faced with the need to make a picture a link so that when clicked or clicked on it, the page we specified in the link will open. Be it a transition to another page of the site, or a click on a picture - a link to another resource. For example, if you need to hang an advertising banner on a website page, then the picture almost certainly must lead to the resource that you are advertising.
How to make a picture a link in html on a website
Good afternoon. About a year ago, I wrote an article: “How to make a flash banner?” In this article I decided to continue this topic, but in a simpler form. We won’t talk about creating a banner, but simply about how to make a picture a link. For example, the picture above is a link to my affiliate course, How to Make a Movie. You can click and see how it works!
LiveInternetLiveInternet
Quote from Nelya_Gerbekova's message
Read in full In your quotation book or community!
Today I’ll tell you how I make a banner, or any image in messages, clickable. This can be done in several ways. The first way is to use code
target="_blank">
To do this, you need to upload the picture to any photo hosting site and take link No. 1, i.e. the address of the picture. Lately I prefer https://fotki.yandex.ru/ but out of habit I uploaded it to radical photo. The link address is the page that will open when you click on the image or banner.
Copy the code into notepad on your PC and carefully paste the link addresses and pictures (do not mix them up)
Paste into a message in the advanced editor by clicking on SOURCE
Send the message to PREVIEW or DRAFT and check the result for clickability. For example, I carry out all the manipulations with the picture in DRAFT, and then each time I take the finished code of the picture from the draft and insert it into the message.
The second method is the easiest. Preparing a clickable image in Radical Photo.
In the link box, delete the link to the photo hosting and enter your link to the transition page. In the second column, click on GO TO URL (in this case, a change should occur in the links, i.e. replacement with your link) As a result, we get ready-made code No. 2 or No. 6.
What is the difference between link #2 and link #6? .
They perform the same function, but have a different appearance in the editor.
For example, I took a picture and made it a link to my own klavdia-France
, which I really liked. Click on the picture!
The third method is to create a clickable image directly in the editor.
In general, I highly recommend storing all your photos on your computer's hard drive D and loading the images into an advanced (visual) editor. Only then can you be sure that instead of pictures, after a while you will not see an empty square. For example, photos in radical photos are deleted after a year and all the work is down the drain. Read the post Why do pictures and photographs disappear?
As you can see from the screenshots and as experienced users say, “rely on photo hosting, but don’t make a mistake yourself!”
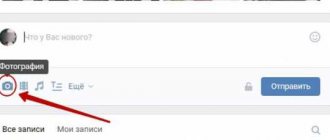
By loading a picture from a PC into the editor, with the help of simple manipulations you can make any picture not only clickable, but also with pop-up text when you hover over the picture. To do this, click on the IMAGE icon and load the picture from your PC. When the image loads, go to the LINK tab
In the drop-down window, in the URL column, enter the link to the transition page
Next, go to the ADVANCED tab and write the pop-up text in the TITLE column.
Click OK and admire the result.
Read the post: How to create a transition button
All the most popular codes are here: Codes for blog design
PS For those who want to work with the code, for a clickable image with pop-up text, I give the code, just don’t forget to insert the dimensions of the image instead of width=100 height=100, where width is the width and height is the height of the image
Series of messages "Designing a diary on LI.RU":
Part 1 - How to create a transition button Part 2 - 7 reasons why you should not insert pictures into comments... Part 25 - Addition to the previous post. How to change the player size Part 26 - How to compress size the picture (background) to the required size for uploading to the diary. Part 27 - How to create a clickable image or transition button in the editor Part 28 - Why do pictures and pictures disappear? Part 29 - Lesson for newbies. Decorating the diary! How to apply and manage schemes Part 30 - Put it under the cut! How to replace the *Read more* link with a picture in the editor Part 31 - How to copy the layout (design) of someone else's diary on LiRu Part 32 - Codes for designing a blog (diary)
Why do you need to make a link from an image?
a) For example, you have a beautiful picture of a wonderful product. You create a link from it, insert it into a specific resource. A person visits this site, sees a picture, clicks on it, and ends up in the online store where this product is located!
Convenient, I think so! The click-through rate for beautiful images is higher than for a simple mediocre link. Often they hide their affiliate links under the pictures.
b) If you have registered in any affiliate program, you have your own website, but the owner of the affiliate program has not provided the necessary advertising materials. What to do in this case?
It is enough to copy the images of his product, place the screenshot on the site, and make the picture a link. This will be something like a banner, but with less load on the site. In my opinion, it is very convenient and beautiful. Especially if you draw beautifully (or know someone who can beautifully draw a certain banner for you). You make a link from this banner image and, again, the click-through rate for this banner image increases.
c) The third reason is similar to the second. I think I won’t tell you the secret that banners significantly increase the load on the site. After all, what is someone else’s banner on your site?
This is an image located on a third-party resource that your site requests while loading one of its pages. The point here is that the time of this request can vary significantly, from a fraction of a second to several seconds.
For example, I used to have a static banner on my website from a well-known company. The banner was beautiful, with constantly changing pictures. But the point is that it greatly slowed down the loading time of the site. Loading time reached 50 seconds. That's a lot!
As soon as I removed this banner, my blog began to load many times faster (the site started loading in 1.5 seconds, not 50!)! That is, you can create a screenshot of this banner, insert a link into the screenshot and its loading time will not be a few seconds, but a fraction of a second! Although, of course, not so beautiful. It will not change, but the site loading time is more expensive!
d) I think I won't surprise the web. masters if I say that some of your banners are simply not visible to users. The browsers of such people have the “Anti-block” or “Adguard” extension installed. These extensions simply block advertising. Including some banners.
If you have an image link, the anti-block will perceive such a banner as a regular image, and without any blocking. For example, I had a “live pictures” banner running for some time, but there were few clicks on it. At first I didn’t understand what was going on, then I saw that Adguard was simply blocking it.
I went to the manufacturer’s website, took a screenshot of the part of the material I liked, created a link from the picture and the result is obvious, not a single blocker is blocking it anymore. Moreover, the copy came out even more beautiful than the original, and works great, you can see for yourself!
https://livephoto.andgin.moviesecrets.e-autopay.com
e) Another reason why it is better to make a banner out of just a picture is that search engines, especially Google, do not like it when there is a lot of advertising on the site. And they will perceive your picture link as just another image, and not as an advertisement. Comfortable? I think yes! But let's get back to the essence of our question.
Creating anchors and hash links
Another interesting attribute is NAME, which used to be quite widely used to create so-called link anchors, which could be accessed using so-called hash links. It's a little confusing, but I'll try to clarify now. Let's say that you need to refer to a specific place in the text of the document (not to its beginning) where a certain issue is discussed.
If you put a simple hyperlink to this article, then after clicking on it, the article will open at the very beginning and the user will have to find in it the place on which you wanted to concentrate attention. So, with the help of anchors and hash links, you can make sure that the article opens exactly where you intended and the user does not have to dig through unnecessary material.
To implement the described method of creating hyperlinks in an Html document, previously it was necessary to first insert an anchor into the article to which the hash link would lead. The anchor was a structure reminiscent of an ordinary link, but at the same time it remained invisible to the visitor. He looked like this:
Those. it turns out that the anchor consisted only of the opening and closing tag “A”, while it did not contain an anchor and had one single required NAME attribute. The parameter of this attribute was a label, the name of which you had to specify yourself. This label was later used to create a hash link.
Now this method of inserting anchors is considered obsolete and the Html code validator will regard it as a gross error. Please pay attention to this. Anchors are now placed by adding an ID selector to the nearest tag.
Let's say that for a headline in an article it might look like this:
How to make an image a link in the sidebar
This is done quite simply. I will give the construction of such an image with a link:
alt="" />
In the link address we insert the entire link, with https:// and other things (although this is not always necessary, but don’t worry about this). The same applies to the image address.
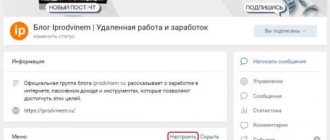
How to find the address of your image? Click on it and you will see your link in a new window at the top. Or, by logging into the admin panel, select “Media” - “Library” and view all your images on the site.
Find what you need, click on the link above, and view the link.
Also, I would like to add that if you want your picture to open in a new tab, it is advisable to add target="_blank" to this code.
Accordingly, our code will take the form.
<a href=»адрес ссылочки» target=»_blank»>a></a>
Images on blogs are most often found in the /wp-content/uploads/ or /images/ folders.
Essentially, the above code is ready to be inserted into your sidebars. You can make it in the center, placing it between the tags
..., or code
As you can see, everything is quite simple.
I advise you to read: - How to make money on the Internet 36 ways and
How to save an image
Place the cursor over the photo, click on the right mouse button, in the context menu that appears you will be asked to save the picture, click on the required item (in Fig. 1, see the item “Save image as ...”), in the window that opens, select the folder on the computer where you will drawing saved.
If the photo is a background image, then you must first go to the image page (see Fig. 3).
You might be interested:
“How to save an image of the monitor screen (take a screenshot)”
Adviсe
Whatever method you choose to create a link image, the main thing is that the original image is good. Try to choose those designs that are not conspicuous and do not irritate with bright colors or patterns. This is especially important for a sitemap. You can make a collage of several photos, darken them, or turn on one of the filters in any graphic editor.
When creating a sitemap, it is recommended to choose images with soft, eye-friendly patterns. Believe me, the key to success is not always a bright picture-link. VKontakte, however, often focuses specifically on brightness and catchiness in order to attract new visitors.