Home / iPhone Repair / iPhone Setup
Back
Published: 01/14/2021
Reading time: 10 min
0
2427
Let's look at how you can hide a photo or folder on your iPhone so that strangers don't see it. We will use the built-in capabilities of iOS and third-party programs.
This article is suitable for all iPhone 11/Xs(r)/X/8/7/6 and Plus models running iOS 13. Older versions may have different or missing menu items and hardware support listed in the article.
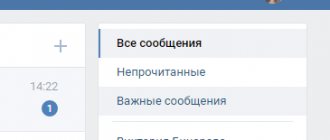
- Built-in iPhone capabilities Hide photos on iPod touch, iPad or iPhone
- Hide photos on a Mac computer
- Show hidden photos
- Photo&Video Locker
How to Hide Photos in Camera Roll on iPhone and iPad
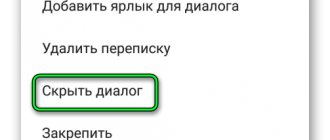
Hiding a compromising photo is very easy. Make sure no one is watching your actions and find the photo you need. Select it in the usual way and click on the “Share” arrow. Scroll down the Quick Actions menu until you reach the Hide option (the icon that looks like a crossed out eye).
Click on the icon and confirm the action. Once you have done all of the above, the incriminating photo will no longer appear in your camera roll.
♥ BY TOPIC: How to instantly go to the first or last photos in the Photos app on iPhone and iPad.
How to hide files in a JPG image
If your computer is shared by multiple users, you may have needed to hide certain files on your computer. There are many ways to do this, and one of them is to hide your files in a JPG image.
You can embed your files into any JPG image and all users will see is just the image. There is no sign of your hidden files and people won't even know that there is something hidden in your JPG photos. However, if someone looks at the size of this picture, they may find it suspicious because this picture will be too big due to the files hidden in it. You can hide your files as a JPG image on Windows computers.
Using the Command Line to Hide Files in a JPG Image (Windows)
If you are a Windows user, you can use a command in the Command Prompt to hide files in an image. This command combines the files you want to hide and the image you decide to use into a single image file.
When you open this image file, it appears as a normal image and there is nothing to indicate there are hidden files.
1. Prepare a JPG photo on your desktop in which you will hide your files. Next, you will need to add the files you want to hide to the ZIP archive. To do this, right-click on your files, click "Send" and select the "Compressed ZIP Folder" (archived) folder.
2. Move the ZIP file to your desktop. Use Cortana search to search and open Command Prompt. Or press Windows + R in the Run line, write cmd.exe and click “OK”.
3. Enter the following command to make the desktop the current working directory. After entering any command, do not forget to press “Enter”.
cd desktop
4. Enter the following command to hide your files in a JPG image.
copy / b source-image.jpg + your-archive.zip target-image-file.jpg
Here's what each part of the command means; you can come up with your own names for pictures and files:
source-image.jpg
is the name of an image that you already have on your computer and in which you want to hide your files.
your-archive.zip
is a ZIP file containing the files you want to hide.
target-image-file.jpg
- this will be the resulting file containing your image and your hidden ZIP archive.
5. When the command is completed, a new JPG image file will appear on your desktop. It will contain the files that you wanted to hide in the JPG image.
Show hidden files
You don't have to use the command line to unhide the files hidden in a JPG photo.
1. To unhide the files, right-click on the JPG image where your files are hidden, select "Open with" and select "WinRAR Archiver".
2. You can click the "Extract to" button to extract the files from the archive and save them to a folder on your computer.
3. Another way to show files is to change the image extension to JPG. To do this, right-click your photo, select Rename, and change the extension to ZIP.
4. You can double click this renamed ZIP file to extract the hidden files.
Use an app to hide files in JPG pictures (Windows)
If you don't want to use the command line, there is a GUI application to hide your files in an image on your PC. This is a completely free application and you can use it to both hide and show files.
1. Download and extract the JPHS Windows
to your computer. Launch the Jphswin.exe file by double-clicking on it.
2. On the main interface of the application, click the "Open JPEG" button to load the original image.
3. Go to where your image is and double click on it to add it to the application. Click "Hide" in the application menu bar.
4. After clicking the Hide button, you will be asked to enter a password to hide your files. Enter the password you created in both fields and click OK.
5. Select the files you want to hide in your JPG image.
6. When you return to the main interface, click "Save jpeg as" on the menu bar to save your file.
7. Select a folder to save the JPG image with hidden files in it.
Show hidden files
You can use the same JPHS Windows application to show your files.
1. Open the Jphswin.exe file. Click on the "Open JPEG" button in the menu bar.
2. Select the JPG image in which you have hidden your files. Once your image is loaded into the app, click Search in the menu bar.
3. Enter the password you used to hide the files and click OK.
4. Select the folder where you want to save your files. Right-click the file you just hid, select Rename, and change the extension to what it was before you hid the file. The file will not open unless you do this.
What do you think about this not-so-common way to hide files in JPGs? Write about it in the comments below.
How to view hidden photos and make them visible again
All hidden photos are placed in the Hidden album, which is located in the Albums section on your iPhone or iPad. At any time, you can make them visible again using the same method you used to hide them.
Keep in mind that the Hidden album is available to anyone who picks up your iPhone or iPad. Likewise, you can take the unlocked device of one of your friends or loved ones and view the contents of the Hidden album.
It's worth noting that starting with iOS 14, the Hidden album can be hidden from the list of albums in the Photos app (more details below).
♥ ON TOPIC: New in iOS 14: how to hide individual applications from the iPhone home screen.
Third party programs
You can hide photos and photo folders on iOS 11 using third-party programs. Let's look at the most functional and common of them.
Photo&Video Locker
Increase
The utility allows you to hide photos and videos conveniently and securely; you can download it in the App Store. Photos will be locked and you will need to enter a secret PIN to view them.
Read How to block an unknown number on iPhone
Application Features:
- Encryption. Hidden folders and photos are not only located on the gadget in a secret place, but are also encrypted using the 128-bit AES encryption system.
- Hidden photos can be rotated on both sides.
- Zoom out and zoom in on hidden photos.
- Blocking entry to the application. If the user forgot to exit the utility, the application will be blocked after the iPhone goes into sleep mode.
- Import pictures from your computer using iTunes import.
Locker: Hide your photos
Increase
The application has functionality for hiding not only photos, but also videos, applications and files that are protected with a fingerprint. Locker can be downloaded from the App Store.
To hide photos, they must be stored not in your own library, but directly in the application. An important point is the Pin code to gain access to photos. If you do not set up TouchID and lose your Pin code, you will not be able to log into Loker.