30.01.2018
| no comments
The social network Odnoklassniki has the function of adding and removing users to the blacklist. The question of how to remove from the black list on Odnoklassniki is asked by many users, so below are several options for performing this action.
Before you figure out how to remove a user from the blacklist, you need to understand what its essence is. Adding to a blacklist deprives a person of the opportunity to view all your data, comment on photos and posts, write personal messages, etc.
Adding to an emergency situation is simple: click the “Complain” button under the user’s main photo, then check the box next to the inscription “Add to blacklist.” You can complain about all members of the resource, regardless of friendship status. When relations with a blocked user have improved, you can quickly rehabilitate him by removing him from the appropriate list.
How to remove a person from the blacklist in Odnoklassniki if you made a mistake
You can return a person to full-fledged friends at any time, everything will depend only on personal desire.
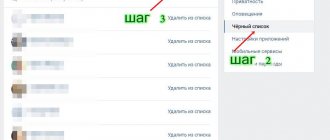
- We carry out all the steps described above, open a window with photographs of those people whose access to the page is limited.
- Place the mouse cursor over the photo of the selected client and select the unlock option that appears. This is the very bottom line of the list.
- Click on the button and confirm the restoration with the delete from emergency button.
That's it, the person has the right to write messages to you, leave comments, rate photos and much more. Now he is a full-fledged friend and you can communicate with him completely calmly. We managed to remove all restrictions.
How to remove emergency on your phone
It just so happens that almost half of ok.ru visitors access the site from mobile gadgets. It could be an Android phone, an iOS device, or even a device without an operating system. Below you will find instructions for removing people from the blacklist both through the mobile version of OK and through their application.
From mobile version
In order to remove a user from the Odnoklassniki blacklist, follow our instructions:
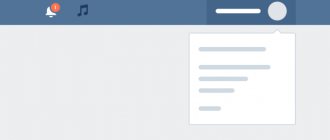
- Having opened the ok.ru address in the gadget's browser and logged in to the site, tap on the menu button (we marked it in the picture).
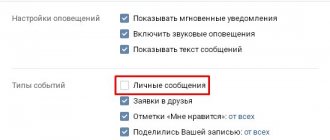
- In the list that opens, select “Settings”.
- Here we see the “Black List” - that’s what we need.
- We select the person we want to unblock and tap on the icon with the image of three dots to the right of the name. As soon as the item called “Unblock” pops up, click it.
That's all. The user will again have access to our page and, if necessary, can return us as friends. We move on to the instructions for unlocking in the Odnoklassniki application.
Via mobile application
So, in order to remove a person from an emergency in the application, we will need to take the following steps:
- We open the menu of our program by clicking the circled button.
- Go to the settings in the menu that slides out on the left side.
- Then tap on the words “Profile Settings”.
- Select the boxed item.
- Just like in the mobile version, tap on the three dots and select the item to unlock the person.
- We will be asked to confirm our intentions. If you agree and want to remove the user, click the button circled in the screenshot.
That's all. Now you know how to unblock a friend in Odnoklassniki from a computer, laptop or phone and what it gives. In any case, if you still have questions, ask us in the comments. We will definitely advise you on how to properly resolve this or that situation.
How to remove from the black list in Odnoklassniki, the second method
- We move the cursor to the “more” item located on the main page.
- In the window that opens, select the Emergency item.
- We are looking for a photo of the person you want to return as a friend.
- Press the unlock button.
The user has been restored to your friend status.
There is a kind of small limitation: a friend removed from the blacklist will not be able to immediately enter into correspondence with you or perform other actions within 24 hours. After 24 hours, full access will be restored.
Where is the blacklist
So, we will assume that in your emergency there is a user who should not be there. What to do in such a situation? First of all, you need to find and look at this list.
To do this we take the following steps:
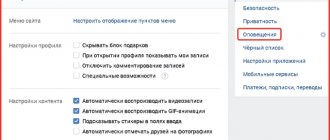
- Click on the arrow located in the upper right corner of the site. In the drop-down menu, select the item marked “2” in the screenshot.
- In the side menu, activate the “Black List” sub-item. That's what we need. Here you will find all users who have been blocked from accessing your account.
After we have found the section we need, we can move on to the main question. To understand how to remove a user from the Odnoklassniki blacklist, read on.
Clear blacklist completely
Clearing the emergency in a few clicks will not work; each user will have to be restored separately. If there are a lot of blocked users, this will take a lot of time. The size of the emergency situation in Odnoklassniki is not limited and many users can be placed there.
The administration does not allow the emergency situation to be completely turned off. Before reinstating a person to whitelist, you should think very carefully about whether they are worth it. Perhaps soon we will have to send him back forever and stop all communication with him.
Social blacklist networks is quite a useful thing, it allows you to get rid of annoying users, people who are simply unpleasant to you personally. But sometimes it turns out that after a quarrel, we send people close to us there or simply make a mistake. This is why it is possible to get a person out of there and continue communication with him. We tried to tell you how to do this in a fairly simple way.
Related Posts
Cheating likes on Odnoklassniki
How to send a video on Odnoklassniki
How to change your name in Odnoklassniki
Adding a person to the blacklist
The “Black List” function in Odnoklassniki offers several methods for hiding your page from prying eyes.
First way
- This is exactly the method described above. In the “Guests” tab, hover the cursor over the person and click “Block”.
- We confirm our intentions in the pop-up window.
Second way
Adding a person to the emergency situation from the “Messages” tab.
- Select a dialogue with the annoying interlocutor and click on the gear icon in the upper right corner.
- Select “Block person”. We meet the already familiar window, confirm – and that’s it!
Removal from the blacklist
This action also has some variability. You can remove a user from the list of unwanted guests at any convenient time in several ways.
First way
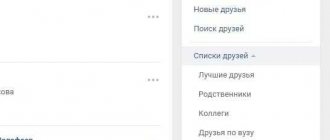
To do this, you need to return to the main page of your profile and go down to the “Friends” section, which has a “Black List” subsection.
We click on the link and get to the page where all the user profiles we have ever blocked are located. We choose the one we want to unblock. We move the cursor over it and select “Unblock” from the pop-up menu.
A pop-up window appears where you need to confirm your actions. Click “Delete”. The blocked user can now view your profile, comment on photos, and send messages again.
Second way
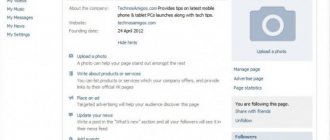
We go to the profile title page. Under the avatar, click the “Change settings” tab.
On the page that opens, in the left column, select the “Black List” tab.
The further list of actions is duplicated from the first method. First, select the user, hover the cursor over him and click “Unblock, and then confirm.
Third way
On the main page of our profile there is the following list of tabs. We are interested in the rightmost button – “More”.
When clicked, a menu opens with a list, where one of the items is “Black List”.
We go to the “Black List” and repeat steps No. 3, 4 and 5 from the first method.
It should be remembered that by unblocking a person, he will gain full access to your public data (if it was indicated on the site). Therefore, before making such decisions, it is better to weigh all the pros and cons and think about whether it is worth risking your nerves again.
If the situation is completely opposite, and you are blocked, then you will not be able to unblock yourself. The only way out is to look for ways to reconcile with the person. Well, or forget about his page forever!
Where to see all blocked users
You can see all those banned in your Instagram account settings. For this:
- open your profile;
- go to settings;
- find the “Confidentiality” tab;
- scroll to the “Contacts” section;
- Click on “Blocked”.
A list of all pages with access restrictions will be displayed on the screen. On a computer it is launched a little differently. After the “Privacy” tab:
- find the “Contacts” block;
- look for the subsection “Accounts that you have blocked”;
- select “Show all”.