How to add a photo to VK from your phone?
Today, every smartphone is equipped with a digital camera, so more and more pictures are taken with the phone. Using an application for iPhone or Android, it is very convenient to upload images to VK directly from your mobile phone.
There are several ways to add your photo via phone to VK:
- attach a picture to a post on the wall,
- download from the gallery on your device.
Upload an image to your VKontakte wall
The easiest way to share a photo with your friends is to throw it directly on the wall or attach it to a post. Go to your page in the mobile version of VK and click on the “Photo” item:
After this, the service will go to the device folder in which the pictures are stored. Check one or more of them and click the checkmark in the upper right corner.
To add a photo from your phone to a post, go to the “New Post” tab and write a few lines or a couple of popular hashtags.
Now click on the camera icon and mark from 1 to 10 pictures that should be included in the recording.
In the same way, you can attach photos to your comments in groups or communities.
Add photo to album
Images can be uploaded to an existing album. To do this, go to the “Photos” section in the drop-down menu on the left. Select the Albums tab and open the one you want. Next, click on the cross in the upper right corner. The system will prompt you to either select an existing image from the gallery or take a photo.
Add a photo from your smartphone without going into the application
You can post any pictures from your phone without directly using the VK mobile application. To do this, find the folder on your smartphone where all the photos are stored, select one or more of them and click on the “Share” icon.
After this, the device will display a list of applications through which you can send this photo to the Internet or to people from your contacts. Click on the VKontakte social network icon. Next, select where you want to upload the image:
- to the album,
- on the wall,
- in documents.
You can also send the picture as a private message to yourself or one of your friends.
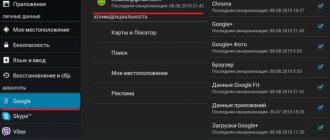
Photo images in VK can be duplicated from Instagram. To do this, you need to link your account in the settings by specifying your profile login and password. Now, when you post on Instagram, activate the VK link and the posts will be duplicated on this social network.
tvoyvk.ru
How to upload a photo to VK from your phone
Uploading photos to the social network VKontakte is one of the main functions used by people spending time in the online world. Adding photos from a computer is a rather trivial process and is already known to everyone, since the web version appeared much earlier than the mobile one. But replenishing albums with new photos from Android and iPhone phones or from the standard mobile version of the site is not described in such detail on the Internet, so let’s look at how to do it.
How to add a photo to VKontakte from Android
Using the VKontakte client application for Android, you can easily add photos to your album. To do this, go to the desired album or create it if not. Click on the plus sign and in the menu select Load from gallery if you already have a photo, or Take a photo if you are just going to capture something.
Next, go to your gallery inside the phone and select the desired image, maybe several. Click on Attach.
The photos have been successfully uploaded to the album and you will be notified.
For iPhone, the whole process is approximately the same as described for Android.
How to add a photo to VK from m.vk.com (mobile version)
To add photos from the mobile version of the site, go to Photos, select an album and click on the Add new photos button.
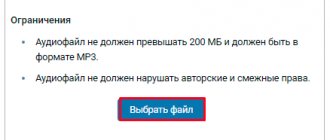
Unfortunately, in the mobile version you can only add 3 photos at a time. Click Select file and load what you need from the phone gallery. Next, click on Upload photos.
Need more images? The process will have to be repeated, or use the full version of the site.
searchlikes.ru
Launch
I became convinced that the application can be tested endlessly and still, after launch, problems will inevitably be discovered. It will have to be updated almost every day for at least the first week.
We tried to make the design, icons, and forms as catchy as possible so that the application will be quickly remembered. For example, at launch we added a robot voice, and now we are planning to announce a competition among users: whoever best voices the same phrase will receive a cash prize. It seems like a minor addition, but it helps to stand out from the rest.
We have made user introduction and training as concise, simple and understandable as possible.
How to put a photo on a contact on Android
There are several ways to add a photo to a contact on your phone. In this case, you can take a picture instantly, and you can also select a picture from the device’s gallery. Additional software is also used for these purposes. It has advanced features and a more convenient interface than the pre-installed manager. Let's look at three main ways to add a subscriber's photo on an Android device.
Direct photo insertion into contact
To set a photo to a contact, use the following algorithm:
- Go to the main menu of your phone.
- Select the "Contacts" section.
- Find the contact you need or start typing the name of the person whose call you want to put a photo on. The result will be displayed below the search bar.
- Select the person, and then click on the area intended for the photo. Two options will appear: “Take photo” and “Select from gallery.”
- If you want to take a photo immediately, select “Take Photo.” A dialog box will appear asking you to select the device through which the photo will be taken (if you have additional software for the camera). Select the program you usually use to take photos.
- Crop the resulting photo using an editor. During a call, only the highlighted area will simply be displayed. Confirm the completion of the operation. The photo is now attached to the selected contact.
- If you already have a picture in mind, then select “Go to gallery”. Tap on the desired image, edit it, and it will also be added to the description of the selected subscriber.
Inserting a photo via editing a contact's profile
It is a small offshoot from what has already been described. To perform it, do the following:
- Once you have completed step 4 of the previous instructions, click on the pencil icon in the upper right corner of the screen. You will be taken to the editing menu.
- Click on the area intended for the subscriber's photo (indicated by a plus sign).
- Follow the instructions from the first method of installing a snapshot.
This option will be useful for users who do not support uploading photos by simply clicking on the corresponding field (this method is described above).
Inserting a photo into a contact directly from the gallery
- Go to the gallery of your Android device.
- Select a photo that you would like to see as an illustration of the subscriber's call. Open the image in full screen mode.
- In the bottom corner of your device, select Settings (Operations), and then tap Set Image As....
- Click on the “Contact Photo” item. You will automatically be taken to the phone book.
- Select the person's name or start typing it in the search bar. Click on a contact.
- Edit the photo size using the preinstalled program.
- At this point, the photo installation process can be considered complete.
Programs for working with contacts
There is a fairly extensive list of program managers that (among other functions) allow you to add and process photos of subscribers. Here is a partial list of such applications:
- Ultimate Caller ID Screen HD. An application for working with a list of contacts and incoming calls. Allows you to quickly set an image on a contact, block callers, select a call melody, etc.;
- Full Screen Caller ID PRO. The program is designed to work with contact photos. Can set an image from the camera, from the gallery and even from social networks. Allows you to stretch the caller's photo to fill the entire screen;
- HD Caller ID. Another easy-to-use program for working with contact images. Displays photos not only during a call, but also during SMS messages.
This is where the options for how to put any photo on a contact from the phone book in Android end. The user always has the choice to use pre-installed resources or turn to third-party programs and applications to process the list of subscribers in the phone book.
Report content
poandroidam.ru
Investments
At first we received three offers to invest in the product, but something told me to wait a little longer. A little later, through a friend, we found a person who was ready to invest in the product - we received the first $75 thousand for development. And they divided them into several trenches.
The advice here is simple: it is better to look for wealthy people who understand that the future lies with the Internet. The ironclad argument is the stories of Delivery Club, MSQRD and Prisma. You need to be confident, not cheap, talk in detail and honestly about all options for the development of events. It is important not to give guarantees of success; it is better to talk in more detail about quality examples and share your own faith in the project.
How to add a photo album to the VK application on your phone - TOP
Hello! Today I will show you how to create and add a photo album in the VK application. You can create albums on VKontakte directly on your phone and upload photos there. See the instructions below and write comments if something is not clear or you have questions.
Open the VK application on your smartphone. Bottom right, click on the Menu button. Then, on the page that opens, click on the Photos tab.
Next, on the page with your photos, at the top, go to the Albums tab. At the top right, click on the Properties button.
In the window that opens, click on the Create Album tab.
On the album creation page, you need to specify:
- Name;
- Description;
- Who can view your album?
- Who can comment on photos?
- Click the checkmark at the top right.
Your album has been created. It will appear in the list of all albums. On its cover, at the top right, click on the Properties button.
In the window that opens, you can:
- Edit album;
- Delete;
- Copy link.
How to add a photo to a VK album
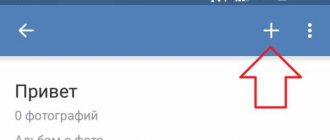
Go to the album page, open it by clicking on it. Top right, click on the plus button.
In the window that opens, you can: Upload a photo from the gallery, or Take a photo with the camera on your smartphone. After which, the photo will appear in your album.
If you have any questions about this post, or if there is something you don’t understand, write your comment at the bottom of the page. They will definitely answer you and help you understand your question. Good luck to you!
info-effect.ru
Creation
To begin with, I checked the idea for originality: there was nothing like this in Russia, in the USA - literally a week before me, someone came up with something similar, but the implementation was weak. Therefore, I tried to add more useful features, and the developer worked on quality and stable functionality.
To test the idea, I started with a test on one version - I settled on iOS. I needed people who would analyze the market, develop the application, create the design and conduct testing. It is curious that in Samara specialists asked for 350-400 thousand rubles for the development of one version for five to six months, while in Moscow - 170-210 thousand rubles.
Then I thought that I could save about 150 thousand rubles if I took on all the tasks except development myself or found someone who would do everything much cheaper. I registered on a freelance website, created an application for a project and found a person who was ready to do the work for an amount of 30 thousand rubles in two to three months. The savings in time and money were colossal.
How to add a photo to VK from a computer and phone to an avatar, to a group, to a wall
Social networks have become a platform not only for communication, but also for publishing images and photographs. The service does not limit the user in any way in the number of uploaded pictures, so people add new photos every day. This can be done using a mobile phone, which often doubles as a camera, desktop computer or laptop.
How to upload a photo to VK from a computer
When creating the social network, a special section was allocated in the menu, which is responsible only for the user’s photos. You have the opportunity to add pictures to the main album, or create a separate one with a description and title. This helps to group pictures, sort them and make searching easier. Adding a photo from a computer to VK is done as follows:
- Log in to your profile.
- In the left menu, find the “Photos” item.
- Next, you can create an album. To do this, click the corresponding button in the upper right corner of the window. Enter the title, information about the photo, set privacy permissions (disable or enable commenting, show to visitors or hide from users).
- If you do not need to create an album, then click on the adjacent “Add Photos” button.
- Your computer's File Explorer will open. Go to the folder where photos for VK are stored.
- You can insert a description for the photo and then click “Add to Album.”
Put it on the wall
If desired, a VK user can upload a photo immediately to the feed of his page. This will help friends notice the post and like it. To add a photo directly to the wall, you must follow these steps:
- Log in from the main page, go to the “Photos” section from the left menu.
- In the upper right corner, find the “Add Photos” button. Click on it.
- A file explorer will open in which you can select 1 or more pictures.
- Next, click on the desired photos and click “Open”.
- After uploading the images, you can edit the pictures. To do this, click the photo editor icon in the right corner. You will have the opportunity to apply filters, rotate the image, and add text.
- If you accidentally added unnecessary photos, you can delete them at this stage.
- You can add a description to the photo. Then you just have to select “Publish on my page.” One or more photos will appear on the wall.
Add to album
To make it easier to manage and sort your photos, the developers suggest using albums. You can create new ones when uploading pictures or transfer them from one to another, rename them and add a description. The method of adding a photo was described above, but instead of posting on the wall, you should select the “Add to album” option. If you want to place a photo in an existing one, then simply go into it and repeat the above procedure.
Post a photo to the group
If you have permission from the administrator, you can post the photo to any group on VK. Sometimes there is access to publications on the community wall. If you want to add a photo to a VK page of a group, you just need to start typing a message, and click the camera icon at the bottom and select the desired photo. To upload photos to the community album, use the following step-by-step instructions:
- Log in and go to the required group.
- On the right, find the section called “Photo Albums.” Click on it.
- A list of all albums will appear in front of you, click on the one you need.
- Next, the algorithm of actions is repeated: click the “add photo” button at the top right of the window, edit and add a description if necessary.
How to put a photo on your VKontakte avatar
In the search results and friends' contact list, you can see a thumbnail of the photo you chose as the main one. This photo is on the VK page as an avatar, other users see it first. Previously, it was always vertical and had specific dimensions, so it was necessary to edit the pictures to fit certain parameters. Now this has been changed and on the page it has a square shape, but in all other places it is round. To add/edit an account you need to do the following:
- Log in using your username.
- Hover your mouse over the place where your avatar should be.
- An additional menu will pop up where you need to select “Update Photos”.
- A file explorer will open through which you can select the desired photo.
- The next step is to specify the area of the image that will be displayed on the thumbnail and VK page.
Download methods from mobile phone
Smartphones have become an affordable option for taking photos anywhere, anytime. There is no need to carry an inconvenient DSLR or point-and-shoot camera with you, and the quality remains at a high level for the Internet. In order not to first upload pictures to a personal computer and then add them to the page, you can use the tools that are available to owners of modern mobile phones:
- download via the VK application for smartphones;
- sending a photo directly from the gallery when viewing.
Via the VK mobile application
Internet via telephone is available in every city, this helps people always stay in touch and not stop communicating. Modern cameras built into mobile phones take high-quality pictures that you are not ashamed to share with friends. There is an official application for using VK for smartphones based on Android and iOS. The algorithm of actions is as follows:
- Launch the application, log in if you have not done so before.
- Swipe from the left to the right to make the menu pop up.
- Tap on the “Photos” section. Switch from the top menu to the “Albums” section.
- If you need a section, add it using the “+” icon or click on an existing one.
- On the top right there will be a plus sign that you need to click on. An additional menu will appear where you will have the option to upload a photo from the gallery or take it right now using the camera.
- When selecting from a gallery, you can tag multiple photos at once and upload them at the same time.
Share photos from your gallery from your smartphone without going into the app
There is not always access to the Internet, so the user accumulates a certain number of photos that he wanted to send to friends. Standard smartphone photo editors allow you to improve a photo: change the angle, apply filters, reduce or increase contrast, etc. Then you can place the photo directly from the gallery on your VK page. To do this you need:
- On your mobile phone, upload a gallery with pictures.
- Open the required photo.
- There will be a menu at the bottom, click on the “Submit” button.
- Next, a list of services will appear where you can upload the image.
- Click on VK and an additional menu will appear where you can choose where to upload the photo: to the wall, album, documents, message.
- While the image is loading, you can add a comment to it.
- Next, click send.
Video
sovets.net
How to add a photo to VK from an Android phone
Home » VK » How to add photos to VK from an Android phone
How to add a photo to VK: to an album, to a group, from a computer or from a phone
One of the features of any popular social network is adding, viewing and commenting on photos. Such functions are available on Facebook, Twitter, Odnoklassniki and, of course, on the social network VKontakte, which is the most popular in Russia. VKontakte developers are constantly improving the function of adding photos, integrating new features, including for photo editing. In this regard, the process of uploading a VKontakte photo is becoming more and more difficult. In this article, we will look at how to add a photo to VK in a personal album or group, both from a computer and from a phone.
Table of contents: 1. How to add a photo to VK on a personal page from a computer 2. How to add a photo to a group on VK from a computer 3. How to add a photo to VK from a phone
How to add a photo in VK to your personal page from a computer
Most often, a user wants to add photos taken to his page from a computer, so we’ll start looking at this functionality from this scenario. To upload a photo to your page, do the following:
- Go to your page and in the menu on the left side of the window, switch to the “Photos” section;
- In the upper right corner of the page that opens, click on the “Add photos” button;
- An Explorer window opens, allowing you to upload a photo from your computer. Find the desired photo, click on it and click “Open”. Please note: If necessary, you can add not just one photo, but several in this way. To do this, select several photos at once in Explorer, then click “Open”.
- The photo upload process will begin. Depending on how many photos were selected, it may take different times.
- Once the photos are uploaded, there are several things you can do:
- Open a photo editor and edit photos. To do this, you need to point at the photo, and then click on the left icon in the upper right corner. A photo editor will open specifically with the selected photo. In it you can apply filters to photos, add text, rotate and perform other actions to change the picture;
- Delete photo. To do this, you need to point at the photo, then click on the icon in the upper right corner;
- Rotate photo. To do this, you need to hover your mouse over the photo, then click on the corresponding icon in the lower right corner;
- Add a photo description. If you want the photo to be published with any information, you can add it under each of the uploaded photos at this stage. It's worth noting that you can also add hashtags, which will increase the likelihood of your photo being discovered by other users when using search;
- Add to album. If you uploaded photos to place them in one of the created albums, click Add to Album. A window will open to select which album to send the photo to. Click on the desired one so that all downloaded photos are transferred to it;
- Publish on my page. By clicking on this button, you will publish the added photos on the wall of your VKontakte page.
Please note: If you click “Publish to my page”, the photos will also be saved in the general list with your photos, but will not be linked to any of the albums.
How to add a photo to a group on VK from a computer
VKontakte groups can have photo albums where you can upload photos. Any user can do this if the photo album is configured accordingly by administrators. To upload a photo to a group on VK, you need to do the following:
- We go to the group to which photos need to be uploaded;
- Next, click on the “Photo Albums” button located on the right side of the page;
- A list of all albums opens. Click on the album to which you want to add photos;
- In the upper right corner of the page that opens there is a button “Add photos”. Click on it;
- After this, a file explorer will open through which you can upload the required amount of photos;
- Once the photo is uploaded, you can edit it if necessary.
Please note that after uploading a photo, it is immediately published in the album, before changes are made to it using the editor.
How to add a photo to VK from your phone
Many users actively visit the VKontakte social network only from a mobile phone or tablet. Most often this happens through the official VKontakte application on Android or iOS. Let's look at how to add photos to your page from it:
- First of all, launch the official VKontakte application and log in to it if you have not done so before;
- Next, go to the “Photos” section;
- At the top, switch to the “Albums” section;
- If you want to create a new album, click on the plus sign in the upper right corner, enter the name of the album and set its privacy. If the desired album has already been created, go to it;
- In the album in the upper right corner, click on the plus sign to add a new photo. Select the option – “Upload from gallery” or “Take a photo”. If you select photos from the gallery, then mark the ones you need, then click “Attach”, and the photo will appear in the selected album.
This is how you add photos to VKontakte groups from your phone.
(132 votes, average: 4.65 out of 5) Loading...
okeygeek.ru
How to add a photo to VK
Detailed instructions on how to add a VK photo from a computer, mobile version and mobile phone. Move through albums, including saved ones. You will learn how to avoid loss of quality when uploading, general requirements for images, and how to specify a different upload date.
How to add a photo to VKontakte - from a computer - to the mobile version - on the phone - to the album Saved photos - to a group - add retroactively
How to transfer photos from album to album
What to do if photos don’t load How to add without losing quality Photo editing
How to add a photo to VK from a computer
2 ways: through uploading to the wall, through the VKontakte Photos menu.
1) Add to VKontakte wall
Click the camera icon on your page.
In the new window, click Upload photo or Take photo if you want to take a photo with a web camera.
Instead of uploading, you can drag the photo onto the wall, it will upload automatically.
Ready for publication, all you have to do is click the Send button:
When you press the lock, the recording will be visible only to friends. After publication, you can no longer open it to everyone; you will have to publish the post again without a lock.
An interesting observation: images with an active lock are not saved in albums, they are only displayed on the wall.
Before publishing, you can write a comment in the What's new line. Attach the file by clicking More. If you need to add more than two VKontakte photos, select on the computer while holding left ctrl. Or immediately move it to the loading field of a social network.
Images uploaded to the wall go into the Photos album on my wall. The name and settings cannot be changed, but you can transfer images to new albums with the specified settings. When you remove photos from the wall, they remain in the album.
2) Upload through the Photos section
The method allows you to immediately upload to a specified album or create it on the fly, without publishing pictures on the page. Go to Photos, click Add, select from your computer through Windows Explorer.
Or drag and drop pictures into the browser:
If you don't select an album, it will load into Photos on my wall. After which you can move it to another album, write a comment, post it on the wall.
If you need to upload to a specific photo album, go there first, then upload the image.
Add in mobile version
Add via the camera icon or the VK Photos menu.
Go to the photo album, upload an image.
Add from phone (android, iphone, tablet)
Two ways: from the main account page, through the Photos menu.
1) On the home page, click Photos.
Select a file on your phone, click Attach at the bottom of the screen, and in the pop-up window select where: Publish on wall, Add to album.
2) Go to Photos, Albums tab. Go to the album where you are uploading, click the plus sign at the top:
Select Upload from phone gallery or Camera snapshot.
Add photo to saved photos
Can't load
inet-use.ru
The target audience was almost clear - girls. To begin with, we targeted advertising from bloggers on Instagram and focused on videos rather than photos, since in this case the conversion is much higher. The main rule: it makes sense to bargain about the cost of each publication. It almost always worked.
We tried to add something new for advertising every time: change screenshots in the store, descriptions, training, design. We once added a “Must Have” text to the main screenshot, and this increased our weekly download rate by 8%.
By my calculations, if I had spent money without haggling, without checking traffic, without changing my approach to reach 130 thousand downloads, I would have spent more than a million.
At some point, they contacted us and offered to bring the application to the top App Store for 700 thousand rubles, explaining that the current market norm is 25-30 rubles per download. I promised to think about it.
A week later, I released a lot of advertising at once (spending only 25 thousand rubles) and the application entered the top 4 of its category and bypassed MSQRD and Prisma. We would have reached first place if only we had time to drop even more advertising. When they called me again and promised a discount, I said that our cost was 1-1.5 rubles. They didn't call me again.