how to add, view and delete
There are a lot of photos on the social network Vkontakte. You have the opportunity to save any image you find to your page. To view or use later. For these purposes, there is a special album - “Saved Photos”.
Now we will learn how to work with it.
What are Saved Photos
This is the image that you saved to your page. It is located in a special album. You can view it, send it to friends, edit and delete.
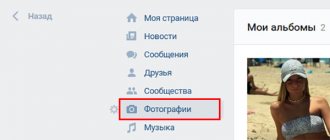
To view, go to your page, open the “Photos” section, and find the “Saved Photos” album.
Adding and deleting
Let's imagine a situation where you found an interesting photo on a user's page. Open it to view. Now at the bottom of the window, click on the “Save to yourself” link.
This image will be sent to your album.
To remove it, open it for viewing. A “Delete” link is available at the bottom of the window (see how to delete all saved VKontakte photos at once).
How to hide saved VKontakte photos
By default, any guest on your page can view this album. To restrict access to it, go to the page settings.
Here, open the “Privacy” tab (see VKontakte security and privacy settings), and find the “Who sees the list of my saved photos” block. Select the desired item from the drop-down menu.
If you want no one to have access to your photos, select “Only me.”
Saved photos from your phone
Launch the application, find and open the desired photo. In the upper right corner of the screen, open the menu and click “Save to Album.”
To view, open the menu, then the “Photos” section, then the “Albums” tab. Here we move on to viewing the “Saved Photos” album.
Conclusion
Deleting a VKontakte album
- Go back to Photos
- Select Edit
- Next, click on “Delete Album”
Deleting an album
In the mobile app, select the three dots above the album.
How to delete an album?
By the way, you are only allowed to delete albums that you created yourself.
If you need to get a link to your album, first open it in your browser and then copy it. It will look like this: vk.com/albumYOUR-ID_208649493 .
Album link
How to save a photo in VK as saved?
It is possible to save pictures from VKontakte not only to the device’s memory, but also to a separate album on the site itself, which is automatically created the first time you use the function.
How to upload a photo from VK
An easy way to do this for most users is to download the image to a PC. However, in the case of VK, this option is optional.
Every photo you see on a social network can be uploaded to a personal album and can be accessed from both your phone and computer.
This is implemented as follows:
- Select the picture you like and click on it.
- The image will open in full size, with comments to the right. However, you need to pay attention to the buttons below. One of them - “Save to yourself” - will allow you to add a photo to your personal album.
- To verify that the required file has been received, simply go to the “Photos” section. Among all the folders there will be a new one called “Saved Pictures”.
User's Memo
It’s easy to understand how to save photos as saved. In the future, you can make a separate album for such images. Uploading files in this way is also more convenient than traditional downloading, since this option saves device memory and allows you to view images from your computer and other devices. In the VK mobile application, the algorithm of actions remains the same.
tvoyvk.ru
Creating a VKontakte album
- Go to the "Photos" .
- Select Create Album .
Creating an Album
- In the new window, write its name and, if necessary, come up with a description, and also set privacy. Usually, by default, all albums can be viewed and commented on by users, and not just friends.
Privacy settings
As for the mobile version of the site, the order is as follows: “Photos” - “My Albums” - “Add new photos” - Fill out all the lines - select “Create an album” .
How to create a VKontakte album?
In the mobile app, open “Albums” and click the plus sign in the right corner.
How to create an album in the VK application?
Saved photos on VKontakte. How to save a photo in VK to an album
Good afternoon friends. In this article we will find out why VKontakte needs the “Saved Photos” album, how to save photos to it and what you can do with them later.
Content:
Sometimes you need to save your favorite photos not to your phone memory or computer, but to a photo album. The “Saved Photos” album was created especially for this purpose. It is created automatically after you save at least one photo to it. Below we will look at how to do this.
How to save a VKontakte photo to the “Saved Photos” album
To do this, you need to select any photo you like - in someone else’s photo album, on the wall, in comments or messages, and in the lower right corner click “Save to yourself.”
How to view saved photos? We go to our photo albums and see that the selected photo is now in the “Saved Photos” album.
You can also attach these photo files, like other photos, to your messages and comments, insert them into news, etc. The main thing is not to forget about copyrights.
How to delete saved photos in VK
To get rid of a saved photo, go to the photo album of the same name, click “Edit Album” and select the photo you want to delete, point it at it and click the cross that appears.
Or you can simply select any photo in this album and in the lower right corner under the photo click “Delete”
If you delete all photos from the “Saved Photos” album, the album itself will disappear.
How to hide saved photos
Not all people want the photos they have saved to be viewed by other users. It will not be possible to hide them in the usual way. To do this, go to the page settings - “Settings” - “Privacy” - section “My Page”
Next, select the sub-item “Who sees the list of my saved photos” and select the desired setting from the drop-down list. If you want to hide them from everyone, then select the “Only me” option.
Good luck and see you soon on the pages of the blog VKazi.ru
vkazi.ru
How to download photos?
- Click on the photo to enlarge it
- Click "More..."
- Select "Open Original"
Open original photo on VKontakte
When opened, the image is loaded in the highest possible resolution.
- Right click on it
- Select "Save picture as..."
Save image as
- Specify the path where the finished photo will be loaded
From the mobile application:
- Open the photo
- Click on the three dots in the corner of the screen
- Select "Save"
Saving photos
Unfortunately, uploading photos is only possible one at a time.
How to add a photo to VK. Instructions in 2 steps
Detailed instructions on how to add a VK photo from a computer, mobile version and mobile phone. Move through albums, including saved ones. You will learn how to avoid loss of quality when uploading, general requirements for images, and how to specify a different upload date.
How to add a photo to VKontakte - from a computer - to the mobile version - on the phone - to an album Saved photos - to a group - add retroactively How to transfer photos from an album to an album What to do if photos do not load How to add without losing quality Editing photos
How to add a photo to VK from a computer
2 ways: through uploading to the wall, through the VKontakte Photos menu.
1) Add to VKontakte wall
Click the camera icon on your page.
In the new window, click Upload photo or Take photo if you want to take a photo with a web camera.
Instead of uploading, you can drag the photo onto the wall, it will upload automatically.
Ready for publication, all you have to do is click the Send button:
When you press the lock, the recording will be visible only to friends. After publication, you can no longer open it to everyone; you will have to publish the post again without a lock.
An interesting observation : images with an active lock are not saved in albums, they are displayed only on the wall.
Before publishing, you can write a comment in the What's new line. Attach the file by clicking More. If you need to add more than two VKontakte photos, select them on your computer while holding left ctrl. Or immediately move it to the loading field of a social network.
Images uploaded to the wall go into the Photos album on my wall. The name and settings cannot be changed, but you can transfer images to new albums with the specified settings. When you remove photos from the wall, they remain in the album.
2) Upload through the Photos section
The method allows you to immediately upload to a specified album or create it on the fly, without publishing pictures on the page. Go to
Photos, click Add, select from your computer through Windows Explorer.
Or drag and drop pictures into the browser:
If you don't select an album, it will load into Photos on my wall. After which you can move it to another album, write a comment, post it on the wall.
If you need to upload to a specific photo album, go there first, then upload the image .
Add in mobile version
Add via the camera icon or the VK Photos menu.
Go to the photo album, upload an image.
Add from phone (android, iphone, tablet)
Two ways: from the main account page, through the Photos menu.
1) On the home page, click Photos.
Select a file on your phone, click Attach at the bottom of the screen, and in the pop-up window select where: Publish on wall, Add to album.
2) Go to Photos, Albums tab. Go to the album where you are uploading, click the plus sign at the top:
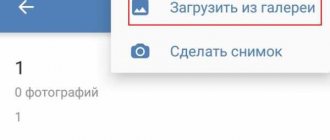
Select Upload from phone gallery or Camera snapshot.
Add photo to saved photos
You cannot directly upload to Saved Photos due to VKontakte restrictions, be smart. Ask a friend to upload the image to your album and save it for yourself.
Add a photo to a group in contact
You can do this without hacking the public if you have administrator rights. On the main page of the group, click Photo Albums. Go to the album where you plan to add photos, click the button.
Add a photo to VKontakte retroactively
When adding materials, VKontakte displays the date and time of loading.
It cannot be changed, neither by the past number nor by any other method. Don't be discouraged - use social engineering. The first thing that comes to mind is to upload a VKontakte photo to a closed album, wait the necessary time, and open access. Friends will see the new album and photos from the past date. If this method is not suitable, apply the required date in Photoshop before uploading, as if you had placed the camera when taking the photo. Make the number immediately catch your eye and grab your attention (orange shades, white font color). Or set the required date in the camera and take a photo. Experiment.
How to transfer photos from album to album
You cannot transfer images from albums:
- Photos on my wall
- Photos from my page
- Photos with me
There are no restrictions for others. Open a photo, click More. Select Transfer to album, specify which one.
VK transfers one image at a time, but what if there are 10, 20, 300 of them? Special VKontakte applications come to the rescue, one of them is Photo Transfer vk.com/app3231070.
A nice bonus: the application works with pictures from Photos on my wall, upload and transfer any drawings there. If you search, you will find photo applications for transferring to contacts from Instagram.
What to do if photos do not load
Reasons for unsuccessful downloading: outdated browser, viruses, too large or small resolution, inappropriate format, album overcrowding.
- The minimum uploaded image size is 200x200.
- The maximum size is the sum of the length and width of no more than 14 thousand pixels (for example, 7000x7000).
- Max quantity in one album is 10 thousand.
- Formats: jpg, png, gif.
The limit on the number of images also applies to the album with saved images. Once you reach the limit, move the part to another album.
Add a photo to VKontakte without losing quality
Have you noticed that colorful images change quality after being uploaded to VK? The culprit is compression during loading. You cannot eliminate the feature, but you can minimize the loss of color and work around the problem. To do this, the resolution of the uploaded photo should not exceed more than 1000 pixels (each side). Also try increasing the sharpness before loading. VK recommends not to click Add new photos, but to drag the photo directly from the computer folder.
Additional recommendation for advanced users: the VK downloader does not like the Adobe RGB color profile. We recommend converting for the Web before uploading. In Photoshop, select Save for WEB (Alt+Shift+Ctrl+S), then edit the quality settings. Check the Convert to sRGB checkbox.
If you want to transfer images to a friend without publishing them online, upload them in the Documents section at https://vk.com/docs and send them as a document via personal message.
Editing photos in VK
Divided into two types:
- Photo editor : color changes, rotation, cropping.
- Effects, adding elements: text, comic patterns.
To open the photo editor or effects, open the photo, click More.
The result will be like this:
There are no photo editors in the mobile version and the VK mobile application, or they are limited. Use the phone's built-in editors.
for-vk.com
to an album, to a group, from a computer or from a phone
One of the features of any popular social network is adding, viewing and commenting on photos.
Such functions are available on Facebook, Twitter, Odnoklassniki and, of course, on the social network VKontakte, which is the most popular in Russia. VKontakte developers are constantly improving the function of adding photos, integrating new features, including for photo editing. In this regard, the process of uploading a VKontakte photo is becoming more and more difficult. In this article, we will look at how to add a photo to VK in a personal album or group, both from a computer and from a phone. Table of contents: 1. How to add a photo to VK on a personal page from a computer 2. How to add a photo to a group on VK from a computer 3. How to add a photo to VK from a phone
How to add a photo in VK to your personal page from a computer
Most often, a user wants to add photos taken to his page from a computer, so we’ll start looking at this functionality from this scenario. To upload a photo to your page, do the following:
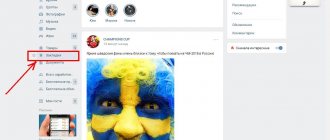
- Go to your page and in the menu on the left side of the window, switch to the “Photos” section;
- In the upper right corner of the page that opens, click on the “Add photos” button;
- An Explorer window opens, allowing you to upload a photo from your computer. Find the photo you need, click on it and click “Open”. Please note: If necessary, you can add not just one photo, but several, in this way. To do this, select several photos at once in Explorer, then click “Open”.
- The photo upload process will begin. Depending on how many photos were selected, it may take different times.
- Once the photos are uploaded, there are several things you can do:
- Open a photo editor and edit photos. To do this, you need to point at the photo, and then click on the left icon in the upper right corner. A photo editor will open specifically with the selected photo. In it you can apply filters to photos, add text, rotate and perform other actions to change the picture;
- Delete photo. To do this, you need to point at the photo, then click on the icon in the upper right corner;
- Rotate photo. To do this, you need to hover your mouse over the photo, then click on the corresponding icon in the lower right corner;
- Add a photo description. If you want the photo to be published with any information, you can add it under each of the uploaded photos at this stage. It's worth noting that you can also add hashtags, which will increase the likelihood of your photo being discovered by other users when using search;
- Add to album. If you uploaded photos to place them in one of the created albums, click Add to Album. A window will open to select which album to send the photo to. Click on the desired one so that all downloaded photos are transferred to it;
- Publish on my page. By clicking on this button, you will publish the added photos on the wall of your VKontakte page.
Please note: If you click “Publish to my page”, the photos will also be saved in the general list with your photos, but will not be linked to any of the albums.
How to add a photo to a group on VK from a computer
VKontakte groups can have photo albums where you can upload photos. Any user can do this if the photo album is configured accordingly by administrators. To upload a photo to a group on VK, you need to do the following:
- We go to the group to which photos need to be uploaded;
- Next, click on the “Photo Albums” button located on the right side of the page;
- A list of all albums opens. Click on the album to which you want to add photos;
- In the upper right corner of the page that opens there is a button “Add photos”. Click on it;
- After this, a file explorer will open through which you can upload the required amount of photos;
- Once the photo is uploaded, you can edit it if necessary.
Please note that after uploading a photo, it is immediately published in the album, before changes are made to it using the editor.
How to add a photo to VK from your phone
Many users actively visit the VKontakte social network only from a mobile phone or tablet. Most often this happens through the official VKontakte application on Android or iOS. Let's look at how to add photos to your page from it:
- First of all, launch the official VKontakte application and log in to it if you have not done so before;
- Next, go to the “Photos” section;
- At the top, switch to the “Albums” section;
- If you want to create a new album, click on the plus sign in the upper right corner, enter the name of the album and set its privacy. If the desired album has already been created, go to it;
- In the album in the upper right corner, click on the plus sign to add a new photo. Select the option – “Upload from gallery” or “Take a photo”. If you select photos from the gallery, then mark the ones you need, then click “Attach”, and the photo will appear in the selected album.
This is how you add photos to VKontakte groups from your phone.
okeygeek.ru
Saved photos on VKontakte - Technology and Internet
Many users of the social network Vkontakte already know what the “Saved Photos” album is. However, not everyone understands how to save images there, where the album is located, and in general, how to interact with it (for example, how to delete photos from there). I’ll also tell you how to hide saved files from prying eyes.
And we begin!
Saved photos on VKontakte
How to save a picture in VK as saved
You have the opportunity to save any VKontakte pictures, not only photos of other users, but also images in groups, conversations, etc.
So, how do you save an image to your Saved Photos album? To do this, find the picture, then click on it and click on the “Save to yourself” button below.
That's all. All that remains is to find the album and look at what was added.
Where are the saved photos located?
To find saved photos, you need to open the “Photos” tab and select “Saved Photos” from the albums.
If your album has a small lock, as you can see in the screenshot above. Then no one except you can view your saves. We'll talk about this later.
You can open images by double-clicking the left mouse button.
Where else can you look at your saves?
You can find your saves in the “Photos” section. But they are also located in the photos section on your personal page.
How to delete a picture from saved photos?
The photo is deleted from the saved files in the standard way. I talked about this in more detail in the article: how to delete photos on VK.
In short, the image is deleted this way:
- Open your saved ones;
- Find the photo;
- Open it;
- Click on the “Delete” button under the photo.
How to hide saved photos in contact
If you need to hide saved photos in VK, then open the settings. In the upper right corner, next to the avatar thumbnail, select “Settings” from the menu. Then go to the “Privacy” tab. Find the item “Who can see the list of my saved photos.” On the contrary, in the drop-down menu, select “Only me” if you want to hide your saves from others. And if you want to make your pictures publicly available, then select “All users” or “Only friends”.
How to transfer a saved picture to another album
Transferring a picture to another album is very simple. To do this, open your saves and select an image. Look down and find the “More” button. In the context menu, click on “Move to Album”.
By clicking on the button, your albums will appear, if any. After which, you select the desired album and the photo is automatically transported.
How to view saved photos on VKontakte
You already know how to view your saved photos. Now let's talk about how to view another user's saved photos.
Lately it's not so easy. Previously, an album with any user’s saves was publicly available. But in 2021, the developers decided to close access to them.
You have the opportunity to view saved files only if the user has granted access at will.
How did the ban happen?
VK specialists closed everyone’s saves. And then the person himself decides to open them to him or not. There are rumors that access was denied due to the fact that a variety of photographs were saved, for which one could get a real sentence. And to protect its users, VKontakte took measures.
Interesting posts:
medicina-treat.ru
What do you need to know about saves in VK?
VKontakte users called saved images any type of image that can be saved to their account. In early versions of VK, users had a separate album, which was called “Saved Photos”. It, as now, could be found in the “Photos” section in the main menu. Today these images are stored with others with this mark. Just enter your photos and they will be located in the first album.
This album is no different from others and is stored in your profile until you delete them from here. Photos are saved in it in any quality. And you can apply the same settings to them as to other images, including your personal ones. They can be made unavailable for viewing. Or open access to all VKontakte visitors so that they can open them.
How to add a photo to a contact from your phone or computer. If I can’t add a photo in contact
If you are registered on the social network VKontakte, then you have probably tried to upload, comment (see how to hide comments on photos in VK) and edit photos.
This is one of the main tasks that users face. Now I will show you how to correctly add photos to a contact from your phone and computer . We will also talk about possible problems that you may have.
Adding photos to VK from a computer
Let's assume that we already have a prepared photo. Let's see how to upload it to contact.
The simplest option. Go to the “My Photos” section and click “Add new photos”.
Windows Explorer will open. Here you will need to find the photo you need, select it, and click the “Open” button.
The photo will be uploaded and you will be presented with the initial editing tool.
What can we do here?
First, fill out the description. This information will be shown just below the photo when you view it.
Next we determine where to store the new photo. You can publish it on a page, or place it in an album (see how to create an album in a VKontakte group). For each of these options, a link or button is provided.
If you select the "Place in Album" option, a drop-down list will appear in which you will need to select the appropriate option.
If you want to use the “Publish to Album” item, a special form will appear. In it you can select an existing album, or create a new one. Privacy settings will also be available for contact users who will view this photo.
When you fill out all the fields, click the “Submit” button.
The easiest option is to immediately click the “Publish on my page” button.
In this case, the photo will go into your album “Photos on my wall”, and will also be published on the wall (see how to return hidden photos on VKontakte).
How to add a VKontakte photo to a group
The process is similar here. You just need to do it from the group page.
Let's try. We go to the group, and in the “Photo Albums” section, click on the title to go to the full list. Next, we click on the desired album.
We open a list of already uploaded photos. At the top of this window you will see a button that says “Add photos to album.”
We already know how to proceed.
Adding photos to VK from your phone
I’ll show you using the example of Samsung Galaxy Lite, on Android OS. I downloaded the VKontakte application and logged in.
Next, I went to the main page of my profile and went to the “Photo” section.
Here you need to go to the album to which you want to add a photo. Next, open the menu - the “Plus” icon in the top panel. An additional menu will appear. Here you need to select where you want to download the image from. Two options are available:
- Load from gallery
- To take a photo
Now you need to select a ready-made photo, or take it using the camera.