Although geolocation is used on Instagram to boast about places where you have been and where you have gone, in reality it has a more global meaning. If you decide to promote your business offline through Instagram, geodata will serve as a way to find you. For example, you run a mobile equipment store, and on Instagram you publish photos of new products. Include a location below your image so potential clients will know where to look for you. Therefore, we read and remember how to do geolocation on Instagram. Well, a very useful function.
Select your Instagram photo or video and edit it as you want
The first thing you need to do is take a photo or video from the Instagram app (or upload an existing one) and edit it if necessary. Crop, adjust brightness and add filters.
When you like the result, click on the arrow or “Next” button in the upper right corner and go to the description and tags page. On this page you can add survey geodata.
How to mark the location of a photograph in a photo
It is a rare smartphone user who does not use the camera function in his gadget. This is not surprising, because the phone is always with us and, if necessary, taking a photo can be done quickly and easily. The camera in a smartphone can be used both to capture a good moment or documents, and to create shots while traveling. Marking the location where a photo was taken using a smartphone can be useful, for example, when visiting interesting places or traveling to save a frame with the coordinates of the shooting point. This data can be used for personal purposes for the convenience of saving information. So, if you need to obtain accurate information about the shooting location, it will be enough to simply look at the image parameters and take the GPS coordinates from there. When creating a frame, the camera will record additional information with coordinates (metadata, EXIF). If the photo of interest with available data has been downloaded to your computer, then just click on the photo parameters and select the section with metadata in the properties.
How to indicate data with coordinates on a photo taken on a smartphone / How to remove the display of coordinates on a photo
Every modern smartphone, like Highscreen brand phones, has a location function - geolocation. The function is very necessary and important, it is thanks to it that GPS works - navigation or the ability to search for a smartphone if it is lost. Because of this, the basic location service setting is usually left turned on. You can check whether location transfer is enabled by clicking on the “Settings” menu item in the “Location/Geolocation” section.
At the same time, the smartphone camera has its own geolocation parameter, which can be turned on or off. The setup is very simple: go to the “Camera” section, select the settings item and find the “Location” section there. Accordingly, click enable if there is a need to link coordinates to the photos being created and click disable if you are not interested in having the shooting coordinates saved on your photos, which is something many people don’t want when posting photos on the Internet.
You should be careful when posting pictures with coordinates on the Internet, since often anyone can view this information by downloading the picture and/or using one of the programs that displays the data. Additionally, there are options for adding data after shooting, deleting such data, or changing it to something else.
See also: How to choose an inexpensive and good smartphone Smartphones with a large battery are convenient How to increase the battery life of a mobile phone What is OTG
Branded online store for mobile phones Highscreen Current catalog of Highscreen smartphones
Click on the “Add a place” button and select a place or use the search
Once you've enabled your Photo Map, there should be an "Add Place" button underneath it. Click on it and a search field and a list of nearby places will appear.
You can either select a place from a suggested list generated by your device's GPS, or start typing the name of the place into the search field if it's not in the list.
If your search doesn't return any results, you can always create a location by selecting the "Add [location]" option. This is a useful feature for small and obscure places that have not yet been added to Instagram.
Click on the selected location, which you either found in the list, or through a search, or created yourself.
How to add an existing location to a post
If a place is already on Instagram, then it’s very easy to tag it on your post. Click on the plus sign to upload a new photo or video. Make all the necessary settings and tap on “Add location”.
Allow the app to access your device's location and choose from the options provided or enter the name in the search bar. If you find the option you need, great, tap on it and indicate your place on the post. After saving the post, a mark about your location will appear under your nickname.
To specify a location in your Story, swipe up from the bottom of the screen and tap “Location.”
If the application does not find the desired location, you will have to first create a new location, and then specify it in the entry.
Look at the location marker on your photo or video
After you post your photo or video, you should see a location tag written at the very top, right below your username. And if you go to your Photo Map by clicking on the small icon on your user profile page, you'll notice that your photo or video with a location tag has appeared on your map.
Setting up geotagging using Google Maps
To set the coordinates of a photo to a file, you need to open them through the menu “File - Add images” “File - Add images from catalog”. Photos will be loaded into the top panel table.
In this table, use the “mouse” type manipulator to select the required one or more photos and through the context menu of the right mouse button on the selected lines, from the menu list that appears, select the item “Show on map” or “Show on map with direction”, “location” and “ direction".
Rice. 3. Geotag context menu
The Geotag utility operates as a local web server and will launch a web browser with that web server's page, which will download a Google Maps map with a moving marker from the Internet. When you move this marker marker around the map directly in the table, the latitude and longitude fields automatically display the coordinates for the selected photos.
Rice. 4. Maps in the browser for Geotag
If “Show on map with direction” was selected in the menu, then two markers will appear on the map in the browser. A marker in the form of a photograph indicates the shooting location, and the second one sets the direction.
Rice. 5. Setting the direction with two markers in Geotag
After setting the “latitude” and “longitude”, the photos are saved through the “File - Save New Locations” menu.
Select places to see photos of other users
Any geolocation you add to a photo or video acts as a link, so once posted, you can click on it to go to that location's Photo Map page and see photos from other Instagram users who have also tagged the location.
The most recent posts will be shown at the top, so the more photos or videos you add, the lower yours will drop in the feed. Feeds of places that are very popular, such as tourist attractions, move quite quickly.
You can turn off the geotagging feature at any time by turning off your Photo Map before making a new post. As long as this feature is enabled, your posts will be added to the map - even if you did not specify a specific shooting location.
How to create your own geotag?
To create your location in the application, you first need to have a Facebook account. Since all geolocations on Instagram come from there.
So let's get started:
- You need to log into the Facebook application from your phone and log in to it.
- Click on “What are you thinking?”, in other words, Facebook asks you to write something. Next you need to select “Where are you?”
- It happens that after these actions some people have such a picture.
- This indicates that you have disabled location services. To enable them on your iPhone, you need to go to settings, then go to “Privacy”, and then to “Location Services”. You will be offered several services, select Facebook and activate it, you can also activate Instagram, this will still be useful to you in the future.
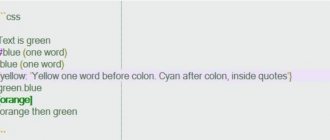
- After the above steps, write your location, then you will need to add it to Instagram. You can call it whatever you want. You can write any words, names, phone numbers, just without pluses and brackets, and if this is a website, then without www. For example, “Flowers to order 30 – Maria”.
- Click on “Add a new location”.
- You will be offered several categories, the choice is not important, so choose any one.
- And you can finally choose a place. Again, the choice is yours. If you wish, you can contribute something of your own.
- If you followed the instructions, a page for creating a new place will open in front of you. They won’t ask you to do anything, just click on “I’m here now” and a check mark will appear, then click on “Create”.
- To finally finish what you started, you just need to publish something with this tag on FB itself. If you suddenly don’t want to do this, then you can simply set it to “Available only to me” mode and publish the post. It will not be visible to anyone except you.
- Now go back to Instagram and post! The previous instructions will help you with this.
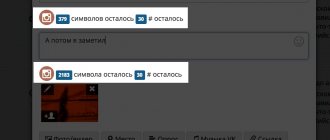
Important! Now you can edit your old posts by adding a new geolocation.
This way you will be doing some advertising, although this is not a typical method. In addition, it will not bother you, as if by chance you are advising people about your products/products.
Why doesn't geolocation work?
Users often encounter a problem: the created geotag does not work - it is not included in the publication, since it simply is not in the list.
We offer you 4 options to solve the problem:
- Make sure you accurately link your Facebook business page to your Instagram account.
- Check if geolocation is enabled on your phone. It's important that Instagram and Facebook apps be able to track your current location while running.
- Restart the Instagram app, or better yet, restart your phone.
- Wait 15-20 minutes - sometimes the created marks do not appear immediately.
What is geolocation and why is it needed?
Geolocation on Instagram is a useful marketing tool that will help promote your business. The owner of a coffee shop, bookstore (or any other establishment) can mark his offline point on the map. This will increase the reach of posts and traffic to your account.
Moreover, using the created geotag, other Instagram users will be able to find your profile, as well as posts with reviews about the establishment. Therefore, if you have an offline business, then spend 10 minutes of your personal time creating your own geotag.
The benefits of geolocation for business:
- It will be easier for social network users to find your establishment.
- Geotagging can be used in stories to increase reach.
- Clients and visitors to your offline location will tag the establishment in their posts. This is another way to increase your brand's reach and awareness.
The Instagram algorithm works as follows: the more often users use a geotag, the higher it rises in the search results in the category of similar tags.
Why is geolocation needed?
Geolocation on Instagram has many non-obvious functions. Tagging the place where the photo from the post was taken is just one of them. In addition, the place mark is used for:
- Building a route. Clicking on a geolocation will open the map in your default mapping application. Usually this is Google Maps. After this, you can build a route from your location to a place on the map.
- Instagram profile promotion. By indicating a popular geotag (for example, Red Square) in the “add place” field, you can attract new subscribers. Under the geographic marker of each place on Instagram, you can see the most popular posts of all time and recently published ones.
- Advertising. This point is relevant for business. Users mark a place, such as a restaurant. Thus, they recommend it to their subscribers. Other people follow the geotag and see a photo from this restaurant. By actively developing the establishment’s geolocation on Instagram, you can attract new visitors.
- Travel publications. Geolocation on Instagram allows you to specify exact coordinates. This way you can share them with friends or save them for yourself to return to your favorite place.