During communication and other activities on the most popular network VKontakte, the user may end up with a real pile of irrelevant, old photos that he no longer needs. Unfortunately, there is no button that would help you completely remove all these files, and deleting images one by one is tedious and takes quite a lot of time. In this regard, I would like to know how to delete all saved VKontakte photos at once, and in general, is this possible?
Ways to delete all saved VKontakte photos at once
It is probably difficult to find a person who does not have his own VK account. Many people spend a lot of time on their profile; some use the page to do business or increase their self-esteem. It doesn’t matter for what purpose, but enough photos are published every day. It’s one thing if all unnecessary photo files are collected in one album, then you can delete it entirely, but more often it happens that they are placed in different albums, and then you’ll have to act differently.
Next, we will tell you three ways to erase images on a social network:
- manually;
- using a special application;
- using a script.
Removing the album
If unnecessary images are contained in one album:
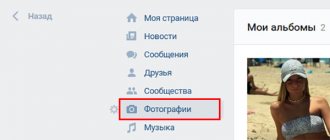
- Go to the “photos” section on your page;
- Then click on the bar called “Show All”;
- To delete an album, select “Editing”;
- After which the system will redirect you to a page where you click the “Delete” button in the upper right corner.
We remove the rest in the same way. However, the problem sometimes becomes the desire to remove only some pictures, and not the entire contents of the album at once. To do this, use the following method.
How to delete a VKontakte album
This method is the easiest to delete photos from a social network.
- First, go to the “My Photos” section;
- We transfer unnecessary photos (those that you want to delete) to a separate album;
- Next, go to the “Edit album” section and click on the “delete album” button.
- If you want to delete not all photos, but one, then to do this, select the desired photo and click the “delete” button
How to remove an event on VK
The first step is to figure out how to delete a VKontakte event for community subscribers and potential meeting participants. There are 3 different options depending on the situation. In the first case, the user received an invitation, but did not have time to make a decision. In such situations you will need:
- Open the invitation page.
- Refuse to visit by selecting the appropriate option.
- As a result, he will no longer see mentions of the disliked event.
The main disadvantage of this approach is that the manager or creator of the event is able to resend the invitation.
The second situation assumes that the user initially agreed to attend the meeting, but later changed his mind. In such a case, it is enough to visit the group and change the decision using the corresponding button.
The third situation assumes that a person wants to completely destroy an event he doesn’t like. In such a case, you can only complain about the event to the administration of the social network. But in order for support agents to decide to delete a community, it is necessary to provide compelling arguments in favor of destroying the community. If there are no such people, it will not be possible to remove the group and its advertising.
How to delete VKontakte photos using the application
The fastest option to delete all saved photos is a specialized application for transferring pictures:
- to use it, you will need to enter the gaming section of VKontakte and type the name of the application into the search bar;
- In order for the extension to open, click on launch;
- then in the “from” line, select the saved photos, in the “Where” field – to the final album for transfer;
- near the “delete/remove” field, click “all”, it is necessary that the selected files are highlighted in red;
- the last action is to move.
At the end, all that remains is to open the album with the moved photos. All that remains is to select them all and delete them by clicking on the corresponding inscription. This procedure takes very little time, and it is possible to delete all photos at once. Fortunately, there is another method for deleting all saved VKontakte photos at once.
The video below clearly shows how to delete VKontakte photos using the application.
Deleting saves via add-on
The service folder cannot be deleted using built-in tools. However, it can be erased using an application posted on the same site.
How to do it:
- Go to the "Games" section.
- Enter the query “Photo transfer” into the search bar.
- Open the program page. Click on the blue button in the upper right corner “Launch application”.
- Create a separate album in your profile to upload saved photos. You can make it private so that friends and strangers cannot see its contents.
- Open the installed Photo Transfer program. Specify the newly created album as the address to which the saved images will be sent.
- Select all pictures to be deleted. Click on the "Move" button.
- After this, the save section will be cleared. Go to the album to delete all the pictures from it.
This makes it easy to get rid of any number of unwanted images. There is a special button to delete photos from the user’s personal folders. With its help you can erase the entire album.
Deleting VKontakte images using a script
To carry out a mass cleanup of files that are no longer relevant, you will need to use a script. The principle of operation is to insert the program code, and then it will help remove the images.
Attention! Deleted photos cannot be returned
This is done after logging into your VK profile:
- Each browser provides its own keyboard shortcuts to open the software console - the easiest way to do this is by pressing F12, there are other options.
- Going to the console a second time, you need to find images and open the first one, stop at the desired album and open the first image. By the way, pictures from your page are selected in the same way;
- After opening the photo, the script code must be inserted into the data entry line.
To remove photos, insert the script:
setInterval(delPhoto, 3000); function delPhoto() { a = 0; b = 1; while (a != b) { Photoview.deletePhoto); a = cur.pvIndex; Photoview.show(false, cur.pvIndex + 1, NULL); b = cur.pvIndex; } }
It remains to add that knowing how to delete all saved VKontakte photos at once, you need to clearly understand that all pictures deleted by such methods can no longer be restored, so first you should think about whether such extreme measures are required.
Special application
The "" application moves pictures into one album and deletes it. If you do not use the program, then to transfer you will need to select each picture and drag it manually into the desired folder.
- Go to the “Games” tab and write “photo transfer” in the search bar, or use ;
- Let's launch the application. In the window that opens, a page will appear on which you select an album, from where the pictures will be dragged and where;
- To transfer, select the photos that appear below. Those that will be highlighted in red and will move;
- Click the “Move” button. The process will take a few seconds.
Thus, create one photo album with unnecessary images and delete it, as in the previous method.
Process
Necessary:
- Go to the page.
- Open code. To do this, press F12. Combinations differ for different browsers and operating systems. You can find them out in the menu with hot keys.
- Go to the console section.
- Now click on the first picture from the list.
- There is a window at the bottom below the codes.
- One of the scripts presented below is entered into it.
Options:
The last option is suitable if the previous ones do not work. But this rarely happens; usually you can easily get rid of the pictures after entering one of the scripts.
It is important that photographs are erased forever. You will not be able to restore them in the future.
Therefore, before deleting you need to:
- Copy pictures to PC.
- You can transfer them to cloud storage.
- Check if all photos have been downloaded.
- You can then erase the pictures.
Now you know how to quickly delete all VKontakte photos. You need to take a few minutes and understand the main steps.
If the script is specified correctly, then deletion occurs without additional problems. But it’s better not to clutter the page with pictures and send them to albums. Then you can quickly erase the photo without using additional tools.
How to add a photo to History
If you created a Story using the method described above, and now want to post not one, but several photos or videos, then do the following.
- Click on the “Camera” button again, which is displayed in the News. Or you can click on the round button with a plus sign.
- Take a photo or record a video. We figured out the photo in the first point, now I’ll tell you about the video. Select the desired section below - “Video story”. Next, press the button in the center and start shooting.
- If you complete it in less than 15 seconds, press the button again to stop recording. You can use the time to the maximum and after 15 seconds the recording will end automatically.
- Next, a window like this will appear. It will play the recording you made.
At the top right there is a picture of a speaker. If it is like in the screenshot, then the video will be added with sound, and if you click on it, it will be crossed out and the video will be added without sound. There are also buttons for editing at the top.
Below are the usual buttons for saving and publishing. We examined them in the previous paragraph.
- If desired, tag a friend to whom you want to send the video you took as a personal message, and click the “Send” button.
- Now in News, click on your Story.
- At the top, the bar will be divided into parts: how many photos or videos were added - so many parts there will be.
At the bottom left there is an image of an eye - this is the number of views by other people.


