Google Chrome has a very convenient tool that helps illiterate or inattentive people avoid making mistakes when writing any texts in this very Google Chrome. Everything works like in Word: incorrectly written words are underlined with a red line. The check is carried out the moment you type text in any form field. This is how the words are emphasized:
But it should be noted that our beloved Google Chrome only checks spelling and does not check spelling.
Spell checking in Word
When writing an article, the Word text editor underlines words, thereby indicating grammatical or punctuation errors. If a word is misspelled and already exists in the program dictionary, the word will be replaced (if autocorrect is enabled). There are cases when you need to check spelling in Word, but autocorrect is not turned on and the program does not underline words with mistakes at all. In this case, let's look at how to check a document for errors in words and punctuation.
An error occurred on VKontakte - what does it mean and what to do
Users are faced with situations when they are sent a notification that VKontakte errors have occurred. Errors occur in the operating system and programs you use. Often such messages are encrypted. But deciphering them is not so difficult; for this you need to use a special program and then you will quickly understand why the error occurred.
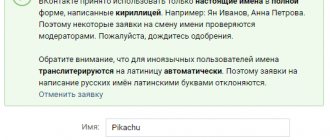
An error occurred on VKontakte - a fairly common situation. This can happen to both an experienced computer user and a novice. The set of letters and numbers in the message that the user receives is a code developed by the administration of the VKontakte site. A “translator” will help you figure out what the coded messages mean.
Setting up automatic text checking
To automatically highlight places with spelling and grammatical errors, you need to:
- Go to the “File” tab and click on “Options”;
- In the left panel of the new window, select “Spelling”;
- In the “When correcting Word spelling” area, check the boxes “Check spelling as you type,” “Use... spell checker,” or “Mark grammar errors...”;
- You can check all the boxes in this subsection, since all of the listed variations will help in working with text.
Attention! If Word has stopped highlighting errors with a red line, then you must uncheck the boxes in the “Exceptions for file” subsection. Go to “File” - “Options” - “Spelling” and finally “Exception for file”. Uncheck the lines “Hide spelling and grammar... in this document.”
After this setting, the document will highlight not only spelling errors, but also punctuation errors.
What mistakes are there?
There are a great many mistakes that a person can make. In this article, we focus on spelling and punctuation errors, since, on the one hand, they are more common than others, and on the other hand, they are easiest to correct using electronic resources. Logical errors, for example, cannot be eliminated so easily.
Types of errors:
- spelling errors/typos - incorrect spelling of a word;
- punctuation errors - incorrect use of punctuation marks: we forget about commas or abuse them, confuse colons and dashes;
- grammatical errors - incorrect use of prepositions, incorrect choice of endings, incorrect construction of sentences, etc.;
- speech errors - the use of words without taking into account their meanings, the use of speech cliches, etc.;
- logical errors - violation of the sequence of presentation, violation of connections between phenomena / events, and others.
How to enable automatic error checking
Thanks to this function, you can easily fix all errors at once. You can turn on “Check spelling and grammar in the text” using the F7 button or go to the “Review” tab - in the “Spelling” section - click on “Spelling”.
A new window will open and the first error made will pop up. You can correct it directly in the “Not in the dictionary” area, or specify the desired form in the “Options” section and click replace.
Attention! MS Word does not automatically correct punctuation marks. Therefore, if you see a green or blue wavy line throughout the text, you will need to make changes yourself, that is, manually. Moreover, the program gives hints after which word is missing a comma.
Next, a new window will pop up with a new error and this will continue until all errors are corrected. After all the changes, a window will pop up notifying you that the spelling check is complete, click on “Ok”.
Word will then provide readability statistics. We hide this notification by clicking on “Ok”.
Enable spell checking
To enable spell checking in Microsoft Office, open the Word software product using the desktop shortcut or the menu item “Start” - “All Programs” - Microsoft Office - Microsoft Word. Click the File tab (Microsoft Office 2013) or click the Office Button (Microsoft Office versions 2010 and 2007). Go to the "Options" section and click on the "Spelling" item. Select the Exceptions menu and click the Current File Name field. After that, uncheck the “Hide spelling errors” and “Hide grammatical errors” checkboxes.
Manual error checking
A red underline means that the word is likely misspelled or the phrase is unfamiliar to Word and is not included in the dictionary. You can easily correct errors manually, as follows:
1) Right-click on the highlighted word and select the correct option in the window that opens.
2) Add a new word for Word to the program dictionary. Right-click on the incorrect word and select “Add to Dictionary” and the underline will disappear. If you continue to use this word, the underline will not appear.
3) Find the book with a cross at the bottom of the Word program (if there are errors) and click.
The correct spelling options will appear, you need to indicate the correctly spelled word.
The most common mistakes
It is impossible to answer precisely, since there may be several reasons. Below are solutions to popular problems when sending messages to VK.
- "Undefined." Solution: go to the system folder “System32” – “Driver” – “etc”. Among other laptop files in this folder there will be “hosts”, open it using “notepad”. Check that there is only one entry “0.0.1 localhost”. Everything that comes next is unnecessary information, you should delete it and restart the PC. If this does not help, you should clear your Internet browser cache and update Java and Adobe Flash Player.
How to change a phrase in the AutoCorrect list
You need to scroll through the entire list and find the phrase you need, highlight it so that it appears in the “replace” field and in the “to” field.
Now all that remains is to place the mouse cursor in the desired field and enter your own spelling of a symbol or phrase, replace and save. Let's look at an example. To quickly write a character(s) in the form of “@”, you first need to add and indicate which character will be replaced.
The actions are standard, as before when adding a new phrase. “File” - “Options” - “Spelling” - “AutoCorrect Options”. In the section where “AutoCorrect”, under the “replace” field, enter “(a)”, and in the “to” field, write “@”. Add and click “OK”.
Now is the time to check. We print the desired fragment of the article and write “(a)” (in the picture below), replacing it with “@” occurs after pressing the “)” final character.
Working with Word will become much easier if you make all the settings for autocorrecting different phrases. Just imagine that you can type (Moscow State University) in one second by just writing three letters “mgu”. Thanks to certain options, the user will be able to automatically check for correct punctuation, very quickly, considering that viewing a document of 10 A4 sheets manually will take a long time. In this case, we are talking about using the “Spelling” option in the “Review” section.
Source
Enable Google's interactive suggestions
If a word is underlined, you can quickly correct it by right-clicking on the misspelled word and selecting the appropriate option.
However, there may not be such variants of words for replacement at all or there may not be suitable ones. To expand this list of hints, you need to enable their search.
Pay attention to the checkbox next to “ Search for hints in Google”
". When you enable this option, every time you right-click on a misspelled word, a request will be sent to Google and there will be more suggestions for replacing the word...
Here's a short note for people and huge progress for literacy