Formatting a VKontakte group - overview of possibilities
- Review
- Registration
- Adding photos and creating an album
- Photo editing and manipulation
- Manipulations with other people's photographs
- Place of study
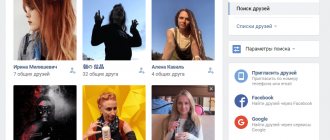
- Search for friends
- Friends, additionally
- Creating graffiti
- Creating a note
- Create a survey
- Create a group
- Group settings
- Administration, group management
- General settings
- How to find all your likes or “Bookmarks”.
The design of the group is in every way reminiscent of the design of your own page on VKontakte.
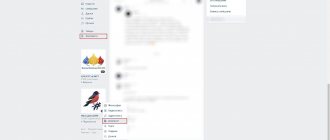
First, go to your group; to do this, go to the “My Groups” section in the menu on the left.
At the top of the page, select the “Management” subsection, that is, those groups in which you have administrator rights.
There is usually no special choice in this section; click on the avatar or group name and go to the main page of your group.
To upload the main image of the group, click on the “Upload photo” link in the photo space.
A window appears to upload an image. Click “Select file” and find the desired picture on your computer.
An image that is too small will not be able to be loaded (at least 200 pixels on each side), as well as one that is too large. It is better to choose vertical images, as they look more presentable.
After uploading, we crop the photo according to the conditions for adding a photo - you can select either a square section of the photo or a rectangular section elongated vertically (extended upward).
The image can be rotated clockwise or counterclockwise (the direction indicators are at the bottom right of the photo). The edges of the image are darkened, and the part that will be shown in the group is highlighted in light. The visible part is a light square; it can be pulled out by the corners or the middle of the sides. Points for photo extraction are indicated in the form of squares. After editing, click “save and continue”.
If the image is elongated upward, then the next step is to select the square visible part. This square image will be visible when searching for a group, as well as in the group itself, when creating comments and messages.
When you are satisfied with the selected part of the image, click “Save Changes”.
I ended up with an elongated image, and in my opinion it looks much better than if it were square.
When writing messages, the image is shown as a square.
The “Latest News” section is designed exactly like creating a note.
Adding a photo and creating albums occurs in the same way as on your profile page on VKontakte.
Audio recordings are added to one section, without creating albums.
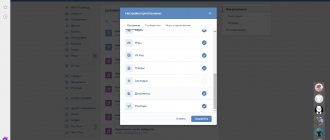
To add a discussion, click on the “Discussions” section.
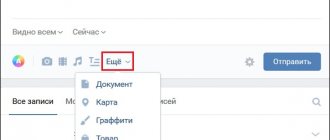
To discuss, you need to create a topic and write the initial text. You can add polls, photos, audio, video and documents in the form of files to discussions; the “Add” button is in the lower right corner.
The discussion will be added on your behalf, that is, as an ordinary user. In order for the discussion to be on behalf of the group, check the box “on behalf of the community” (below the text). The discussion will be created after clicking “Create topic”.
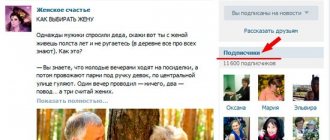
On the right side of the page, under the main photo and the list of participants, the sections “Videos”, “Documents”, “Links” to other groups or sites and “Contacts” are shown.
To add a link, just enter the email address of the site or VKontakte group. If you create a link to another page or group within the VKontakte social network, then you don’t have to write the full address, that is, you don’t have to add “https://vk.com/”.
You can also go to the section for adding links from the “Community Management” section, select the “Links” tab at the top.
You can edit the number of participants in the advertised group and get acquainted with the appearance of the future link. After clicking “Add” the link becomes visible in the group.
Videos and documents are added in the same way as regular photos.
Contacts show the group creator and, if any, administrators. To avoid showing anyone, go to the “Contacts” section and select actions.
You can simply delete your contact so that the creator of the group is not visible, or, on the contrary, add contact information using the “Edit” section.
When editing, a position, phone number and email address are added.
poisk-v-seti.ru
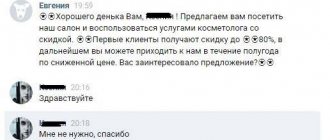
We're reaching out to the community
We fill out the discussion section and create subsections in it - “Your questions”, “How to order”, “Vacancies”. You can also create a questionnaire for variety.
Don’t forget to fill out your contact details too. So that a person understands who to contact - regarding ordering goods, advertising or your services.
To understand who to ask a question, write down the position - manager and the person’s responsibilities. This way you will quickly let the user know who he should contact with his question.
The most important thing, I almost forgot