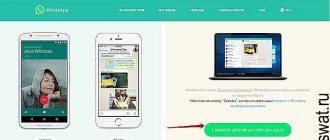
— July 28, 2021 19:01 — 0 Comments A screenshot is a snapshot of the screen of a computer or mobile device. It is used to show another person what is happening on the monitor, to save some important data or correspondence, etc. In the material below we will provide instructions on how to make a screenshot in VK from a computer or smartphone. In OS Windows, the action can be performed using built-in system tools or using an installed program.
How to take a screenshot in VK on a computer
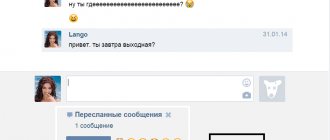
If you need to take a screenshot from a computer or laptop, then open the desired page on VKontakte. For example, I’ll take a photo of messages on VK.
Now find the “Print Screen” button on your keyboard and click on it. This may be a separate button, or it may be on the same key as "SysRq". Also, its name may not be written in full, but “Print Scr”, or “Prt Sc”.
After you click on it, nothing will happen.
Create a new MS Word document and paste the photo you just took into it - press Ctrl+V.
Then save the document with the screenshot on your computer or laptop in a suitable folder.
I saved it directly to my desktop.
It is not necessary to create a new document with a screenshot, I will talk about this further. But this method can be useful if you have to send screenshots of VKontakte pages to the support service.
Screenshot program
It is much faster and more convenient to take screenshots in a special program. Screenshot Creator is just such software, and it weighs only 494 KB. We offer a small guide for downloading and installation:
- Go to the link https://www.softportal.com/software-5454-screenshot-creator.html
- Save the installation file on your computer and click the “Download” tab.
- Unpack the rar archive and install the program in the standard way.
Now you can proceed directly to creating a screenshot. The program can take pictures of the entire screen, only certain areas or the active window. In order to familiarize yourself with the working keyboard shortcuts, you need to go to the settings menu. This can be done by right-clicking on the icon of the running program (located near the clock).
Recommended: Failed to load VK image
If you don’t want to keep all the settings in your head, you can do this:
- Simultaneously press the Ctrl+PrtSc keys.
- Use the mouse to select the part of the screen you are interested in.
- Press the Enter key.
- In the dialog box, set the saved image format: *.jpeg.
Now the screenshot will be sent to the clipboard, from where it can be pasted into any place convenient for the user.
How to send a screenshot from a computer
We figured out how to do it, but if you have an informal correspondence and you want to immediately send a screenshot to VK, then you don’t have to create a document in Word.
We remove the page using the “Print Screen” button. Then open a conversation with the person you want to send the screenshot to, place the cursor in the message field and press Ctrl+V. The photo you just took will be attached to the message. Send it by clicking on the arrow.
We simply inserted a screenshot and sent it, and now the person will be able to see the picture that is displayed on your computer or laptop.
Now I’ll tell you what to do with the Word file in which you have saved the photo. I named it “Doc1” and saved it on my desktop - we did this in the first step.
Open a conversation with a user who needs to send a photo from a laptop or computer, and click on the paperclip to attach files. Select “Document” from the list that opens.
Now click on the “Upload new file” button.
Explorer will open. Find the folder where you saved the document, select it and click “Open”.
The file will be attached to the correspondence. Send a message.
You can read more about VKontakte documents and working with them in the article by following the link.
How to take a screenshot
I won’t go into detail about how to take a screenshot, since I described this in more detail in my separate blog article. But if you don’t know this, then be sure to read it.
There are a whole bunch of ways to do this, both built-in and software. But I wouldn't recommend doing this through good old Paint. With all due respect, this method is already as relevant as the Nokia 3310 or Siemens A35 is now, if you know what I'm talking about. Use special programs to take screenshots. LightShot and Joxi the most in this regard .
Taking pictures on your Android phone
If you access your VKontakte profile from a phone or tablet, then you can take a screenshot as follows. Open the page you want to photograph on your device screen.
Then everything depends on the model of your phone or tablet. You can make a screenshot in several ways:
- hold down the power and volume buttons (volume down),
- or hold down the power and home button,
- or hold down the power button and minimize all windows.
For example, I have a “Screenshot” button in the notification area. By clicking on it, you get a photo of the current screen.
After this, the photo will be saved on the device. I now have a folder in my “Galleries” called “Screenshots”.
Taking a screenshot on your phone
In modern smartphones, the screenshot function is integrated into the operating system. To use it, you only need to press the desired combination of physical keys located on the case. Since the combination depends on the OS version, it makes sense to consider the issue in more detail.
On Android smartphones
For Android phones, you have the following screen capture options:
- Hold down the "Home" and "Power" buttons. Typically used on early Samsung smartphones.
- Simultaneously press and hold the phone power off and volume down buttons for a few seconds. Sometimes the latter should be replaced with a volume up key.
- A rather rare option is to simultaneously press the “Home” and “Back” buttons. Both are located under the smartphone screen.
- In some new mobile device models, a screenshot is taken using a gesture. You need to move the edge of your palm over the display from left to right.
To send the resulting image to a VKontakte chat, open the dialogue and attach the image, selecting your phone memory as the source.
In Apple smartphones
The method for creating and sending a screenshot in iOS is similar, and the key combination depends on the smartphone model:
- On the iPhone X and other new models, the following combination works: press and hold the “Power” key, then press “Volume Up,” then release both buttons.
- iPhone 8 and earlier models use a combination of the Home and Power buttons.
- On iPad tablets, a screenshot is created like this: press and hold the top key, then press “Volume Up”, then release both buttons.
Reference. The created picture is saved in the following path: “Photos” > “Albums” > “Screenshots”. Sending to a social network is performed as in the Android system.
Let's summarize. If you need to take a screenshot, you can use several options for completing the task. On a computer, a more convenient option is to use a special program, and on smartphones, the image is saved by pressing the appropriate keys.
Related Posts
VKontakte requires experts from various fields. Recruitment will start very soon
2 easy ways to get votes on VKontakte
Why can't I log into VK?
How to send a photo from your phone to Android
Now let’s figure out how to send a screenshot you just took on VK to another user from a phone or tablet.
Find a conversation with the person you want and click on it.
Next, to the left of the message entry field, click on the paper clip to attach files.
The following window will open. At the top, make sure the “Photo/Video” icon is active. Just below, the “Photo” tab should be selected. Find the screenshot in the list of photos and click on it. If you have several, select them immediately. After that, click on the “Attach” button.
The photo will be attached to the message. Click on the arrow at the bottom right to send a photo.
I think everything worked out for you. Now you can either describe your problem to the support service more precisely by attaching a file with screenshots in a message, or show another user what you see on the VKontakte page on your device.
How to send a screenshot on VKontakte. Create and send a screenshot to a friend: step-by-step instructions
So, first, a little theory. A screenshot is an image of a user's screen. In the picture it looks exactly the same as you see it on your monitor.
As already noted, such a snapshot can be used to demonstrate the operation of an application or for educational purposes. I also need to add that it makes no difference how to take a screenshot: in VK or on any other site.
The technology used to photograph the screen as the user sees it is the same for all cases.
So, our computers are designed in such a way that each of them has a “standard” way to take a picture of the screen.
To do this, you just need to find the “PrintScreen” button on your keyboard (on a Lenovo laptop it’s called, for example, “PrtScr”) and press it. After doing this, a full-size screenshot was sent to your computer.
Next, our task is to see it, to receive it in a material understanding.
For this purpose, open any (the most common are Photoshop and Paint, you can choose one of them). Next, click “Create New” and “Paste” (or press the hot keys Ctrl + V). Your photo will appear on the screen instead of a white canvas. Then you can edit it in a way that is more convenient.
Thanks to this instruction, you know how to take a screenshot of the “VK” dialogue in the standard way. Next, we’ll look at how to send screenshots to your friends, and also how this operation can be carried out using a specialized program that makes working with desktop photos much more convenient.
How to send a screenshot?
So, after placing the image in the field of the graphic editor, it is time to save the photo. This is done simply: open the “File” menu, then “Save As” and select the name of the screenshot and the address where it will be placed.
In the future, to transfer a photo that you took earlier, you can use mail, social networks, Skype and other programs. In this aspect, your choice depends solely on which one you are used to using.
This is already much simpler than the question of how to take a screenshot on VKontakte.
We take a photo using a special program
The procedure for copying a screenshot using a key to the clipboard and then saving it is simple. True, this mechanism is not very convenient if there is a need to create a series of screenshots. In this case, the question about VK should be answered: using additional software.
There are quite a lot of programs that can perform this task. For example, these are FastStone Captur, Screenshot Captor, PicPick, LightShot, Joxi and others.
Each is a comprehensive piece of software that can effectively capture your screen. Some can even save the photo in finished form, uploading it to third-party servers and only giving you a link.
True, in terms of ease of use, each of these programs is individual, and it is not a fact that all of them will suit you.
Editing a Screenshot
So, we have described two ways to take a screenshot in VK. Now let’s clarify how to edit (change) a photo of your screen.
Such a task may appear before you if, for example, you need to change some data: paint over something, highlight, change, apply some effect, and so on.
In this case, it will be necessary to use a graphic editor.
That is, using the first method (via the clipboard), you insert the photo into the editor and can work on it; and in the case of using the second method (special program), it will be enough to open an already saved image and carry out the necessary actions on it. Again, it all depends on the complexity of the task: a banal shading can be done in Paint, but you only need to “falsify” something in Photoshop, since the functionality there is much wider.
You see, the question of how to take a screenshot in VK is not something complicated. This is done simply and quickly. Try it yourself!
How to insert a screen into a VK dialogue, step-by-step instructions with screenshots.
Do you want to learn how to consistently earn money online from 500 rubles a day? Download my free book
=>>
Often when communicating with partners, colleagues, students or assistants, you need to show a screenshot. If the conversation is conducted according to , then it is enough for this.
In this case, you can not just show a photo, but also demonstrate any actions, accompanied by an accompaniment. It is very comfortable.
But, in my practice, there have been situations when a student or client did not have one, and I had to communicate on social networks by writing messages.
Often, I had to attach screenshots to such messages. It happens that I ask to show what is happening on the student’s screen, and in response I receive the question: “I don’t know how to insert a screenshot into the VK dialogue, tell me what needs to be done.”
At first I thought it was a fairly simple action that could be described in two words. However, upon reflection, I realized that it is simple for those who are good at computers. And from the point of view of beginners, such an action can be quite difficult.
Therefore, it was decided to write detailed, step-by-step instructions for beginners.
A screenshot is a snapshot of the entire screen or any part of it. I have already written more than once about how to properly take a screenshot and where to find the screenshot on your computer. That is, how to find out in which folder it was saved.
For those who don't know about this, read the following articles:
I will go directly to the topic of the lesson. So, there are quite a lot of ways to transmit images on social networks, I will tell you about three that I use myself.
Insert screenshot using hotkeys
The fastest way to insert a screenshot is as follows:
This is a quick and easy way to send a screenshot in VK messages. However, I want to note that this method may not work for everyone. There have been cases when a student was unable to insert a screenshot using this method.
I can’t say what the reason is, it’s possible that the Print Screen button didn’t work, or maybe there were other reasons. But, be that as it may, if this method did not work for you, then move on to the next method.
Uploading a screenshot from your computer
For the second method, you should save the screenshot on your computer. Since the screenshot is saved as a graphic file, it therefore needs to be uploaded in the same way as photographs. Open the section with VK messages, find the message into which you should upload the screenshot.
Then, to the right of the dialog box in VK, click on the thumbnail with the image of the camera.
Or move the cursor to the paperclip miniature to the left of the text entry window and select a photo in the window that appears.
An explorer will open, with which you will find the desired image on your computer. Click on it once and click on the “open” button. Or by double-clicking on the picture, you will immediately start the process of uploading the screen to a VKontakte message.
Screenshot online
These days I prefer to take screenshots with Lightshot. The convenience of this program is that you don’t have to download the screenshot to your computer, but save it on the server, that is, on the Internet.
At the same time, my computer is not cluttered with unnecessary screenshots. By taking a screenshot and saving it online, I get a link to that screenshot.
How to insert a screenshot into a VK dialogue, summary
Source: https://sonyps4.ru/kak-otpravit-skrinshot-v-vkontakte-sozdaem-i-otpravlyaem.html
Sending screenshots via Lightshot
If you don’t want to take screenshots manually, you can use a special program or browser extension. Yes, they need to be installed, but you can transfer images in literally 5-10 seconds.
For example, you can connect the Lightshot add-on to your browser for this purpose. It is extremely simple to use:
The picture will be immediately uploaded to the server, and you will see a link to it. Copy it and you can send it anywhere - to VK, to chat, to forums, etc.
To preview the screen, click the “Open” button. A new tab will appear where you will see the final result.
As you can see, this method is much simpler and more convenient. It is recommended to use it. By the way, instead of Lightshot you can use any other program or browser extension. Fortunately, there are plenty of options - Joxi, Clip2Net, Awesome Screenshot, etc.
That's all. Now you know how to take a screenshot and send it to a friend. As you can see, it's not difficult. At home, it is recommended to use the second option, but on someone else’s computer (at work or at a party) you can do it the classic way.
Good afternoon! In this short article I want to give several ways on how you can send a screenshot to other users using image hosting. And, of course, I will highlight the most interesting hosting sites for exchanging pictures.
Personally, I use both options described in the article, but more often the second option. Usually the necessary screenshots lie on the disk for weeks, and I send them only when someone asks, or I post a small note somewhere, for example, like this article.
1. How to quickly take a screenshot + send it to the Internet
I recommend that you definitely try a program for creating screenshots (Screen Capture, you will find a link to the program just above in the article, in the note) and simultaneously sending them to the Internet. You don’t even have to do anything: just click the button to create a screenshot (set in the program settings), and then you will receive a link to the downloaded image on the Internet!
Where to save the file: on the Internet?
In addition, the program is completely in Russian, is free, and works in all the most popular Windows operating systems.
2. “Manual” method of creating and sending a screenshot
1) Take a screenshot
We will assume that you have already taken the necessary pictures and screenshots. The easiest way to make them is to click on the “Preent Screen” button and then open the “Paint” program and insert your picture there.
It is also desirable that the screenshot is not very large and weighs as little as possible. Therefore, convert (or better yet, immediately save) it into JPG or GIF format. BMP can weigh a lot, if you send a lot of screenshots, someone with a weak Internet will wait a long time to view them.
2) Upload images to some hosting
Let's take for example such a popular image hosting as Radikal. By the way, I would especially like to note that the pictures here are stored indefinitely! Therefore, your screenshot uploaded and sent to the Internet will be able to be viewed in a year or two... as long as this hosting continues to exist.
Radical
To upload the picture(s), do the following:
1) Go to the hosting website and first of all click the “review“ button.
2) Next, you need to select the image file you want to upload. By the way, you can upload dozens of images at once. By the way, please note that “Radical” allows you to select various settings and filters (for example, you can make the picture smaller). When you have configured everything you want to do with your images, click the “upload” button.
3) All you have to do is select a suitable link (in this regard, by the way, “Radical” is more than convenient: there is a direct link, a preview, a picture in the text, etc., see the example below) and send it to your friends in: ICQ , Skype and other chats.
Note. By the way, for different sites (blogs, forums, message boards) you should choose different link options. Fortunately, there are more than enough of them on Radical (on other services, usually, there are no fewer options either).
3. Which image hosting should I use?
In principle, any. The only thing is that some hosting sites delete images very quickly. Therefore, it would be more appropriate to use the following...
1. Radical
Excellent service for storing and transmitting pictures. You can quickly publish any pictures for your forum or blog. Notable advantages: no need to register, files are stored indefinitely, maximum screenshot size is up to 10MB (more than enough), the service is free!
2. Imageshack
A good service for sending screenshots. Perhaps the fact that if the picture has not been accessed for a year may be alarming, it will be deleted. Overall, not a bad service.
3. Imgur
Greetings friends!
Many people are confused by the question of how to send a screenshot via the Internet - this is very important, since screenshots may be needed anywhere and anytime. For example, you need to show a friend some cool photo, or insert a picture into a message on the forum.
There are also times when you urgently need to send scanned documents, etc. by email. We'll look at sending screenshots for all occasions; you won't have any more questions about this.
If you suddenly don’t know how to take screenshots, then this article will help you: Is this the first time you hear these words? Let's read and get enlightened!
And yet, it often slows down the computer, to fix this you need to configure it, update the flash player, how to protect yourself from this error is written in the article.
How to insert a screenshot into a VK dialogue, simple methods
How to insert a screenshot into a VK dialogue, some users have difficulty with this issue. In this article, we will look at simple ways to send screenshots from both a computer and a phone. We will also learn what screenshots are and what user problems they solve.
Briefly, what are screenshots and why are they needed?
Hello, friends! What are screenshots? These are unique images that were taken using a program for creating screenshots from a computer (phone) screen. Screenshots are needed mainly for websites (blogs) or simply for sending messages to users on VK, by mail, and so on. Let's give a few examples.
For example, you have your own blog and write articles on it. You need to show certain actions that are difficult to describe in text. It is much easier to take a screenshot and show the order of actions with arrows.
Or you communicate with users on VK and want to send him a screenshot of your screen. Screenshot is the fastest way to send photos. You can take a screenshot of a photo and simply send a link to your colleague. How to insert a screen into a VK dialogue - we will do this in the next part of the article.
How to insert a screenshot into a VK dialogue
So, in order for you to insert a screen into a VK message, you first need to install the program for creating screenshots Joxi, Yandex or another utility. Otherwise, it will be impossible to take a screenshot. The fact is that not everyone in Windows operating systems has the Print Screen key working. Using this key, you capture an area on the screen from your computer.
After receiving the screenshot, we can move on to solving the question of how to insert the screen into the VK dialogue.
How to send a screenshot to VK from a computer
To send a screenshot to VK from your computer, run the program for creating screenshots and press the key – Preent Scrin or CTRL+Print. (We will use Joxi as an example). Then select the part of the computer screen that you want to save. Then the screenshot will appear on your computer desktop.
And now you can send it by message to VK. How to do it? Open your page, message section. Then select any dialogue and click on “attach photo” to upload a screenshot from your computer. (Picture 1)
Select a screenshot from your desktop and send it to the dialogs. Thus, you will send the screen to your friend or acquaintance in the VK dialogue.
How to send a screenshot to VK from your phone
If you use the Internet on your phone, then there is limited functionality for working on social networks. Therefore, there is an easy option to send a VK screen from your phone. Open your VK page and the messages section in the left menu of the control panel. Then click on the paperclip icon next to “photo from device” in the dialog section and send the screenshot by clicking the “send” button (Figure 2).
After a few seconds, your interlocutor will receive a new message in a video image.
How to send a screenshot to VK with a link from Joxi
To send a screenshot to VK with a link from Joxi, you need to run this program on your computer and click on the “copy” button, select the screenshot that you made earlier. It is in the latest downloads. (Figure 3)
Click on the copy button with the left mouse button, then go to the VK dialog and right-click paste it into the specified field to send it later. (Figure 4).
Thus, you will send the user a screen with a link to this program. By the way, you can send the link through any resource - Skype, email, any other social network.
Uploading a screenshot to an album on VK
How to upload a screenshot to a VK album? It's simple. Go to the photos section on your page, then select your album to upload a screenshot. If you don't have an album, you can create one. To do this, in the same section, click “create album”, write a name, description, and at the final stage create a new album. In this case, you can already add a screenshot.
Click add photos, and upload a screenshot from your computer desktop by clicking the “open” button (Figure 5)
After this, wait until the screen is uploaded to your VK album.
How to upload a screenshot to VK on the wall
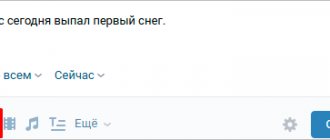
If you want to upload a screen to VK on the wall, use your page again to do this. Go to the main page, and where you usually write an entry, find the “camera” icon. Click on it, and two options for uploading screenshots will open in front of you - from your computer, this is if you click on “upload photo” or from your albums where screenshots were previously published.
Conclusion
In this article we looked at the question of how to insert a screenshot into a VK dialogue. Indeed, it couldn’t be easier if you use these simple tips. By taking screenshots, you can create unique images and thereby fill your page with various pictures. Good luck to you!
Best regards, Ivan Kunpan.
P. _ S These articles will help you take screenshots and save them on your computer (How to take screenshots on a computer, How to create a screenshot on a computer Joxi free download, Screenshot using Yandex disk).
Source: https://biz-iskun.ru/kak-vstavit-skrin-v-dialog-vk.html
How to upload a screenshot to the Internet and show it to others?
Now we’ll find out how to store and share screenshots in this service, go to the project website, and select the desired pictures with the “Select files” button (up to 20 pieces), then click the upload button.
After this, we get direct links to the picture, copy it (keys Ctrl+A - selection, Ctrl+C - copy and Ctrl+V - paste) and paste it anywhere, for example, on social networks, or you can try pasting the picture in your comment.
I’ll say right away that VKontakte, or email, has built-in functions for these purposes
, and
they are much more convenient to use
. How to do it? Now we will find out too.
How to quickly send a photo in a VKontakte message?
In the message form there is a special icon (photo camera) for sending screenshots and photos, and if you click the “Attach” button, you can add other different files: video recording, audio recording, document, etc.
Sending invitations to a group on VK
If you want to use it, I can recommend one of the best programs for promoting communities.
It has a huge number of useful functions (autoposting, liking, inviting, parser, mailing, liker).
One of my favorite features is inviting
. Using this function, you can set up mass mailing of invitations to a group of users or friends.
Moreover, there will be no account blocking for suspicious activity due to the imitation of the work of a living person.
Inviting users
into the community is a very effective way to promote a group. What do you think about this?
At first, when we created a group or public, we just need to get hold of the first participants and invite friends to our group in contact. Yes, so that it is safe and effective.
In this article I will show you how to invite the first hundred and even thousand people to the group. Your community will already become popular and, with proper further development, will begin to bring you money.
Therefore, the next step after creating, designing and filling out the main content of the group is adding friends to the group!
Creation and promotion of a group on VK
I'm looking for SMM to create and promote a community on social networks (vk). The work is not very difficult. But Knowledge of wiki markup, Adobe Photoshop or another editor in which you could process photographs and draw pictures of groups and other things...
When you have created your group and add information to it, it is so important that the number of its participants increases. But when a group or public page is new, people simply don’t find out about it for so long. Therefore, you need to invite people to the VKontakte group yourself. Read below how to do this!
1. Go to your VKontakte page, find “My Groups” in the menu.
2. Here you see all the groups and public pages in which you are a member. To make it easier to find the group to which you want to invite people, click on the “Management” tab. This way we will invite friends to our groups. You can also invite people to other people's groups.
3. Find the desired group and click on it.
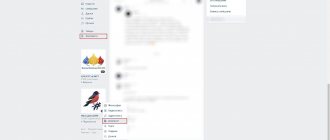
4. Under the avatar you see “You are in a group”, click on this link and select “Invite friends” from the drop-down menu.
5. A list of friends who are not members of this group has appeared and you can invite them. Just click “Send invitation”.
You can also click “Invite friends from the full list.”
You can now invite friends from your full list by clicking “Invite to Group.”
Now let's see how to invite friends to a public page.
1. Open a public page.
2. Under the avatar we see the inscription “Tell friends” and a message icon.
With a few steps, you can increase the number of participants and subscribers in groups and on public VKontakte pages.
Many questions arise. One of them is dedicated to filling the group with live participants. Moreover, users must be really interested in the topics of the community. Inviting friends to the group
is one of the most effective and free methods of community promotion.
How to invite friends to a group on VK
You can only invite your friends to the group. It will not be possible to send an invitation to users who are not friends.
Every 24
hours
you can invite
up to 40 people
to any groups from one account. You can first choose their interests and then invite them to the community.
This will provide high-quality and productive traffic for your group. After all, users themselves decide whether to join the community or not.
But be careful: excessively adding strangers as friends and sending them invitations may result in temporary account suspension.
To invite to a group on VK
our friends, do the following:
1. Go to the community to which we want to invite friends.
2. Join it (If you are not a leader), click on the inscription “You are in a group” and select the “Invite friends” link.
3. A list of your friends will open, from where we send invitations.
- If desired, you can cancel the invitation;
If you need to invite friends to the group
according to certain criteria (age, gender, interests), then click on the link.
A list of all your friends will open. We select friends through “Options” according to certain criteria and click “Invite to group” next to them.
As I already said, you can send up to 40
invitations
. If you try to add more, you will see a message like this.
And, if you see such an inscription.
- This means that your friend has limited the circle of people who can invite to the community;
Invite to a VK group from your phone
also very simple:
1.
We open a community in which you need to send invitations.
2.
In the upper right corner, click on the ellipsis.
3.
We invite our friends to the group by simply clicking on their first and last name.
- Selecting criteria from a mobile phone is not possible;
Bottom line
I don’t see the point in writing five more ways to send your screenshot to VK via a computer, since these three are enough for you. Personally, I liked the second method the most, with simple copy and paste, as it is the fastest and most convenient. But it is possible that you will not agree with me, so I would like to find out from you which method you liked best.
Well, with this I say goodbye to you. I hope that my article was interesting to you. Do you want to keep up to date with everything new and interesting on the blog? Be sure to subscribe to my notifications and posts on social networks. I'll be waiting for you again. Good luck to you. Bye bye!
Sincerely, Dmitry
Kostin
I can’t invite friends to the VK group
If you decide to invite friends to the group, but instead you see this picture (there is no “invite friends” button).
This means that you are not a member of a group, but a public page (public).
- You cannot invite friends to public pages;
But there is a way out: you can safely invite friends in just one click (if you are the owner of a public page).
Remember: it depends on the real participants, so invite those friends who will find the community’s material interesting and useful.