How do other Internet users see my VKontakte profile?
VKontakte offers great opportunities for setting up the privacy of your page; you can customize literally every section of your profile. To do this, go to the “Settings/Privacy” section. The basic information of the page can be safely shown to everyone; based on this data, other users will be able to find you on the network. If you have filled out your profile quite completely, all Internet users, by typing your name in a search engine (for example, in Yandex), will find out when your birthday is, what you are interested in, where you worked, studied, whether you have a husband/wife, their name Your contacts will also be available.
Photo: Vk.com
But it’s better, of course, not to disclose complete information about yourself to children - you will find and add your classmates and friends from a music school or sports section yourself, and strangers have nothing to do in your profile.
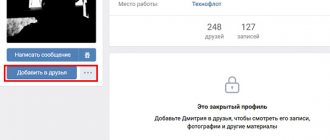
What is a closed VKontakte account?
Until recently, to ensure privacy on a social network, it was necessary to block access for each specific item separately using privacy settings. It took a lot of time. The developers tried to solve this problem. Now personal data is hidden from prying eyes with just a few clicks.
Strangers and unwanted guests will only be able to see:
- first and last name (if it is specified correctly);
- date of birth;
- city;
- place of work (many people don’t write it down);
- total number of friends;
- number of records per page.
People who are not on your friends list can write to a person with hidden information, if this function is not limited by privacy settings. You can close messages from strangers separately. If the owner of a private account approves the friend request, the information will become available for viewing.
On a note!
A stranger will not even be able to see reposts of a confidential profile. This information will only be available to the account owner.
Photos you were tagged in - who should I show them to?
Then you need to decide whether and to whom you will show the photos and videos in which you were tagged. This is perhaps the most unpredictable function of the social network - by posting your photos, you can change the privacy level for them at any time, but finding out that a friend has published a dubious video from a party may be too late. That is, when you find out about this, you can immediately correct the privacy level for it, but if it has been hanging in your feed for a day, many will have time to enjoy it without your participation. Therefore, limit access here, at least only to friends or a group of friends. Again, if you want, you can then show the video or photo to everyone after you watch it yourself.
mobile version
Due to the fact that the mobile application provides slightly fewer features than the full-fledged version, it is much easier to include comments.
Option 1: Profile
The ability to create comments within a user account directly depends on the profile privacy settings. Therefore, you can enable or disable them only from the corresponding section.
- Open the main menu and click on the settings icon in the extreme corner of the screen.
- In the list presented, select the “Privacy” section.
- Scroll the page to the “Wall Posts” block.
- In order of priority, set the items “Who can see comments on posts” and “Who can comment on my posts” to your preferred value.
- To remove any restrictions from third-party users, it is best to select the “All users” value.
For images you upload, comments must be enabled separately and only when the images are in one of the user albums.
- Open the Photos page from the main menu of the application.
- Go to the Albums tab and find the photo album you want.
- On the album preview, click on the “…” icon and select “Edit”.
- In the “Who can comment on photos” block, set the value that suits you.
- After that, save the settings by clicking on the checkmark icon.
In the case of videos, comments can only be enabled separately for each file.
- Open the Videos page using the start menu.
- Click the “…” icon on the preview of the desired entry and select “Edit” from the list.
- Click on the link “Who can comment on this video” and set the appropriate parameters.
- Just like with a photo album, when you're done editing, click the check mark icon.
At this point, the instructions for enabling comments in your profile can be considered complete.
Option 2: Community
In a group or on a public page, comments can be configured in the same way as in a personal profile, but with a few differences in terms of section naming. At the same time, the differences with the full version of the site are again minimal.
- On the main page of the public, click on the settings icon.
- Now select the “Services” section.
- Within the “Wall” block, select one of the proposed values, carefully reading the description. After that, use the button in the upper right corner of the screen.
This article can be completed here, since the application does not provide the ability to in any way change the privacy of albums in a group, which directly affects the photo settings. At the same time, you can include comments on video recordings in the same way as we described in the previous method.
We are glad that we were able to help you solve the problem. Add the Lumpics.ru website to your bookmarks and we will be useful to you. Thank the author and share the article on social networks.
Describe what didn't work for you. Our specialists will try to answer as quickly as possible.
What profile sections can be opened to everyone?
Lists of groups and gifts are harmless possibilities; most likely, open information about this will not harm you. And briefly about the dangers of open access to other functions: • other people’s posts on your page, available to everyone, can tell about very personal events when friends come running to joyfully congratulate you on the wall on the birth of a child or a wedding; • if anyone can write on your wall, you may one day receive a portion of negativity from inappropriate people or advertising garbage; • If anyone can send you a message or invite you to a group/app, you run the risk of reading spam from strangers every day and rejecting requests from crochet clubs.
How to make imaginary privacy settings in VK
In the new version of privacy settings, which appeared in the fall of 2018, the social network allowed you to close your profile from strangers with two clicks. These imaginary privacy settings in VK do not hide individual content, but limit strangers’ access to page data. To turn on:
- click on the name in the upper right corner of the page;
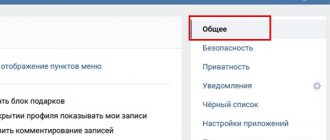
- go to settings;
- select the “Privacy” tab;
- At the bottom, find “Profile Type” and switch to private;
- scroll up to the “Contact me” block;
- In the “Who can write messages” option, select “Friends only”.
Please note that fake settings do not protect against identity theft or complaints from others about questionable content. It is better to configure each privacy setting separately, hiding other people's posts, comments and albums.
What does my profile look like from the outside?
To check whether you have set up your page the way you wanted, and whether anything unnecessary is visible to all Internet users, you can click the “See how other users see your page” button at the very bottom of the page. If you suddenly find that the whole world is seeing photos that you really don't want to show to anyone except your friends, change the settings and they will take effect immediately. Your profile can be seen either by all Internet users, or only by VKontakte users, or by everyone, but the page will not be included in the search engine (that is, no one will find you for a query in Yandex or Google).
Screenshot of the VKontakte page Photo: Vk.com
How to hide profile information on your computer
Closing a VKontakte account is quite simple. It won't take much time. In order to make the information on your personal page confidential, just follow a few simple steps.
Sequencing:
- At the top of the screen, click on the round avatar icon.
- From the pop-up menu, select “Settings”.
- Next, click on “Privacy”.
- Scroll to the very bottom of the page. Find the “Profile Type” item and click on it.
- From the list that appears, select “Private”.
Using a hidden profile is relevant for those who strive to keep their lives secret from strangers, but willingly share events with their friends. Public people, online stores, bloggers do not need this function at all.


