What are the settings for and where are they located?
Initially, when you create communities, you immediately go to the VKontakte group settings and there you need to set all the necessary data. In addition, usually the group settings constantly change depending on the tasks, and I’ll tell you where to find them later.
In the screenshot below, I showed where you can get to the settings of your community, namely by clicking the “Manage Community” button under your community’s avatar (in the case of a public page, it will say “Manage Page”.
Other community settings
Now let's look at the other tabs. “Participants” tab. Here you can see who is in your community, and also, if necessary, remove someone from the community.
These are, in principle, the basic settings of the VKontakte community. You can easily figure them out yourself, but if suddenly you don’t work in social networks at all and you need promotion, then you can safely contact us.
I provide consultations and also help promote VKontakte communities.
I hope you found this article helpful and will share the link on social media. Also, don’t forget to subscribe to blog updates to stay up to date with all the events.
That's all, bye everyone!
If you have recently acquired your own community on a social network or are just planning to do so, you may have a lot of questions, one of the most important is how to edit a group in VKontakte.
The more interesting content you have, the better. Add thematic photos to the album, you can find videos on the topic and add them to your videos. All the main settings for your “virtual hobby club” are located in the “Community Management” section in the menu under the main picture on the right.
Menu for a group in Contact
- We need to work on the design and improve the navigation. You've probably already seen in many large communities beautiful buttons with which you can get to subsections.
- The menu can be ordered from designers; there are a huge number of such offers.
- You can also read the article on how to simply and beautifully design a group.
Entries to the group in VKontakte
Of course, filling the main page is one of the main aspects. The popularity of the community depends on what you write on the wall: whether people will come and not only join, but also stay for a long time, invite their friends and actively participate in the life of the community. You can write posts on your VKontakte wall yourself, or you can order them from professional copywriters if you have a commercial project.
You can allow participants to post on the wall, but in this case you may face an invasion of spammers, especially if the promotion is successful. They will leave advertisements on your wall without a twinge of conscience, and even if the wall is closed, but comments are open, they will spam them.
This is a double-edged sword: if you close the wall, you will get rid of spammers, but this will have a bad effect on the group as a whole, because people on VKontakte love to comment and write posts, and you will deprive them of this opportunity. Ideally, you should give the opportunity to post on the wall and comment, but often moderate it, removing spam and other “unnecessary things”. Member rights can be configured in the “Information” tab in “Community Management”.
Group discussions
Under the information about the group there is a “Discussions” section, some do not pay attention to it and do not use it, but in vain. It resembles a regular forum, an administrator or participant creates a topic, and everyone can discuss it. Here you can create any atmosphere you want, everything will depend on the nature of the topics for discussion in the community. The main thing is that there is no silence here.
To begin with, the administrator will create topics, and when the group becomes popular, the participants themselves will want to discuss some issues and will create topics if you give them the rights to do so in the settings. Try to create topics that encourage people to comment and engage in dialogue.
Tagged: vkontakte, group
net.extrablog.ru
How to register a VKontakte group
If you are the creator of your own VKontakte community, then sooner or later you will encounter such a problem as creating a group. To simplify this process, as well as to avoid many side problems that arise for the vast majority of beginners, we advise you to follow the recommendations from this article with special care.
Formation of a VK group
To begin with, it is important to clarify that within the framework of this article we will not consider details directly related to the process of promotion and maintenance of the public. We suggest that you familiarize yourself with one of the earlier articles, in which we described in sufficient detail the rules for running a community.
Read more: How to lead a VK group
As with group administration, it's a good idea to set some rules before you begin the community design process so that you don't have problems with the design being too chaotic later on. This especially applies to the design style of posts posted on your group’s wall.
Each public participant who has the rights to post entries must be familiar with the community rules.
In addition to all that has been said, it is important to note that if you have a large enough budget and are ready to allocate it to the development of the group, then the best option is to purchase ready-made design styles from professionals.
How to edit a group in contact?
A group in contact is a great way to maintain some kind of audience for a famous person or a service provided, a business, and so on. How to create and learn to edit a group in contact?
It’s simple if you’ve been in contact for more than a day. Then you will know which action will lead to what.
So, let's figure it out step by step.
If you are an administrator or editor (moderator) of a group, you can change some information about the group. Without going into any menu, right on the page you can change the status of the group or go into discussions and find the Edit button there. This way you can specify how many topics will be shown on the page and how the topics will be displayed; at the top there may be the one that was recently edited or some entries were made there.
Under the group avatar there is a Community Management button. There you can thoroughly change the group - name, page address (instead of numbers you can write a word). There you write a description of the group, select a category and decide what to do with privacy, whether the group will be open or closed, who can add photos and audio, create albums, and so on. You can also edit members, add them to the blacklist, make someone an administrator or demote someone. Also in the same menu you can indicate the city in which the group is located or add a link to other accounts or services.
You'll figure it out quickly, good luck!
qalib.net
Setting up a VKontakte group
Every community is designed to serve the goals and objectives of its creator. Using the settings, you can make any community as relevant as possible to your idea.
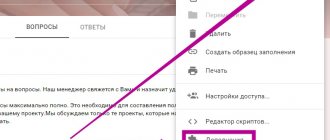
Setting up a VKontakte group can be done by its owners or administrators. To start editing a group, go to it and click on the three dots under the main photo. You will see the following menu:
The main thing in it is the first point, “management”. There are several main blocks here.
In “Basic Information” you can change the title (it and the page address must be required, the rest of the items are optional), add a description, define the type, and upload the cover.
Basic Information Options
The “Additional information” block will allow you to customize the topic, indicate the site address, indicate the location, and provide other data:
Additional Information
At other points you can:
And now some useful tips:
How to change the address of a VKontakte group
This feature is available in Settings. If the address is already taken, you will receive a notification accordingly.
Enter the address name
After saving, the new page address will serve as a link to the group.
How to find out the VKontakte group ID (how to find out the VK group number)
If you have not changed the page address, the default ID will be the last row of numbers contained in it (set automatically).
If you changed the page address to a specific name, it will be more difficult to find out the ID. To do this, move the cursor over one of the menu items and use the right mouse button to copy the link address. Enter it into the browser, and if it contains numbers (which it doesn't always do), then this will be your page ID.
Click on any menu item
How to hide a group on VKontakte
To do this, just go to the “Groups” section in the left vertical menu, hover over the ellipsis opposite one of the communities in which you are a member, and select the “Unsubscribe” option.
Unsubscribe
Other group secrets and instructions on how to edit groups on VKontakte can be obtained on the official help page https://vk.com/support?act=home:
Other points
Video:
Good day to you, dear reader.
Are you looking for information on how to manage a group in contact? I would like to dot the i's right away - the topics of group management and its management differ from each other. If you are still interested in leading a group, then you should.
And in this article we’ll talk about managing a group.
Formatting a VKontakte group - overview of possibilities
- Review
- Registration
- Adding photos and creating an album
- Photo editing and manipulation
- Manipulations with other people's photographs
- Place of study
- Search for friends
- Friends, additionally
- Creating graffiti
- Creating a note
- Create a survey
- Create a group
- Group settings
- Administration, group management
- General settings
- How to find all your likes or “Bookmarks”.
The design of the group is in every way reminiscent of the design of your own page on VKontakte.
First, go to your group; to do this, go to the “My Groups” section in the menu on the left.
At the top of the page, select the “Management” subsection, that is, those groups in which you have administrator rights.
There is usually no special choice in this section; click on the avatar or group name and go to the main page of your group.
To upload the main image of the group, click on the “Upload photo” link in the photo space.
A window appears to upload an image. Click “Select file” and find the desired picture on your computer.
An image that is too small will not be able to be loaded (at least 200 pixels on each side), as well as one that is too large. It is better to choose vertical images, as they look more presentable.
After uploading, we crop the photo according to the conditions for adding a photo - you can select either a square section of the photo or a rectangular section elongated vertically (extended upward).
The image can be rotated clockwise or counterclockwise (the direction indicators are at the bottom right of the photo). The edges of the image are darkened, and the part that will be shown in the group is highlighted in light. The visible part is a light square; it can be pulled out by the corners or the middle of the sides. Points for photo extraction are indicated in the form of squares. After editing, click “save and continue”.
If the image is elongated upward, then the next step is to select the square visible part. This square image will be visible when searching for a group, as well as in the group itself, when creating comments and messages.
When you are satisfied with the selected part of the image, click “Save Changes”.
I ended up with an elongated image, and in my opinion it looks much better than if it were square.
When writing messages, the image is shown as a square.
The “Latest News” section is designed exactly like creating a note.
Adding a photo and creating albums occurs in the same way as on your profile page on VKontakte.
Audio recordings are added to one section, without creating albums.
To add a discussion, click on the “Discussions” section.
To discuss, you need to create a topic and write the initial text. You can add polls, photos, audio, video and documents in the form of files to discussions; the “Add” button is in the lower right corner.
The discussion will be added on your behalf, that is, as an ordinary user. In order for the discussion to be on behalf of the group, check the box “on behalf of the community” (below the text). The discussion will be created after clicking “Create topic”.
On the right side of the page, under the main photo and the list of participants, the sections “Videos”, “Documents”, “Links” to other groups or sites and “Contacts” are shown.
To add a link, just enter the email address of the site or VKontakte group. If you create a link to another page or group within the VKontakte social network, then you don’t have to write the full address, that is, you don’t have to add “https://vk.com/”.
You can also go to the section for adding links from the “Community Management” section, select the “Links” tab at the top.
You can edit the number of participants in the advertised group and get acquainted with the appearance of the future link. After clicking “Add” the link becomes visible in the group.
Videos and documents are added in the same way as regular photos.
Contacts show the group creator and, if any, administrators. To avoid showing anyone, go to the “Contacts” section and select actions.
You can simply delete your contact so that the creator of the group is not visible, or, on the contrary, add contact information using the “Edit” section.
When editing, a position, phone number and email address are added.
poisk-v-seti.ru
What is included in the concept of “group management”
To manage a group means to be its creator or appointed leader. Managers vary in their powers. They are divided into:
- Administrators
- Moderators
- Editors
The greatest powers among them in managing a group in contact are vested in community administrators. Managing a group means being able to:
- Name the group or change its name and description
- Give her a nice address
- Upload and change the cover and other group design (thumbnail and avatar)
- Enable or disable any blocks (photo albums, videos, documents, links, audio recordings, open or close a wall,)
- Connect an advertising company
- Ban participants or vice versa
- Delete posts and comments from group members and even edit them
- Moderate suggested posts (applies only to public pages or public pages, there is no such function in groups)
Well, we’ve sorted out the concept of “group management”, now let’s answer the question “how”.
How to add an article to VKontakte
Quite recently, in one of the articles on our blog, we looked at and you learned “How to make a greeting in the VKontakte group?” We continue the topic of introducing new functionality. This time we will consider the possibility of adding and formatting articles in a new convenient and functional format.
The new option can be used by both ordinary users on their personal wall and administrators of public communities in order to attract attention to their posts and increase the number of subscribers/sales.
It's easy to start using the new editor. On your profile page we find a field with the text “What’s new with you?” and click on a specific new button with the letter “T”.
In a group or public page, we do the same by selecting a field and clicking the corresponding button described above.
Let's go to the editor.
The first line “Come up with a name” will initially be written in capital letters using the tag
How to manage a group in contact if you are the creator
We believe that our group has already been created. Now what?
To begin with, we can configure the blocks we need:
- Links
- Photo albums
- Videos
- Audio recordings
- Discussions
- Events
- Places
- Goods
We can either turn them on, turn them off, or make them limited.
How is the group managed?
Our main button is three dots under the avatar or group cover.
Click it and select “Community Management” from the drop-down list. We will also discuss other items in the drop-down menu within the framework of the article.
In the window that opens, we have the opportunity to: change the name of the group, write down its description, upload the cover, give a nice address, add a link to the site if there is one.
Item "Sections"
In the next item on the right menu, “Sections,” we can enable the sections we need or disable those we don’t need. Among them are: links, discussions, photo albums, videos, products. You can edit their locations. This is done in the same window, by designating the main block and the secondary one.
The main block will appear at the very top, immediately below the group description.
"Discussion" item
Find out how to enable the “Discussions” section and all the accompanying features from the article.
Item "Comments"
Here we can completely disable the ability to comment on any group posts, or vice versa, enable them. You can also enable the obscene language filter.
Working with API It is better not to touch the “Working with API” item at first.
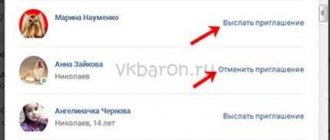
Item "Participants"
But we will need the “Participants” item. Here we, as the creator of the group, can remove any member from the group or appoint him as a leader (by selecting one of the forms administrator, moderator or editor).
Here you can send any group member to the blacklist. Once a person is blacklisted in your community, he will be denied access to your group.
Item "Messages"
The next menu item in the right column is “Messages”; by clicking on this button we are taken to the window for editing this function.
If you want people to write to you in the name of the group and not in a personal message, then you need to enable this feature. Below you can write a welcome speech that a person will see when he decides to write something to you for the first time.
After enabling this function, a “Community Messages” button will appear in your group on the main page. And if you click on it, you, as the creator or admin of the community, will have the opportunity to switch the slider to the right (it is located in the upper right corner), thereby turning on the “Community is online now” notification.
After this, each visitor to your group will display this inscription “Community online. They will answer right now” - which will further encourage them to write to you and, perhaps, become your client.
Item "Applications"
The “applications” menu item was added a couple of years ago and is constantly being updated.
Here is a complete list of applications approved in contact. You can choose any application suitable for your business and configure it in your group.
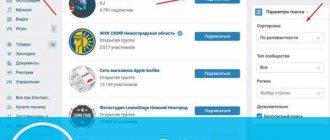
Item “Group Statistics”
In addition to the listed settings, the creator and admin of the group can view its statistics. And based on the data obtained, regulate the vector of development of the group.
You can view it by also clicking on the three dots under the cover or group avatar and selecting “Community Statistics”. In the window that opens, you will see 3 or 5 tabs - this depends on the settings you have made and how popular your group is.
If you have just created a group, there will be 3 tabs: reach, attendance, activity.
By scrolling through all the tabs to the end, you will find out who your audience is in the majority - men or women, how old they are, what cities they are from, how they got into your group, from what devices, how many new participants were in the group today, what was the attendance and how many people saw your posts today or any other day.
This is a separate, very large section of knowledge in the field of the social network “in contact”, and the next point in group management.
Item “Add to left menu”
This item in the drop-down menu is displayed in the same way as the previous ones only for the creator of the group and its admin. After clicking on this button, you will see a link to your group in the left menu of the VK interface and can quickly go to your community.
This is also convenient because you can quickly respond to messages sent to you by potential clients addressed to the community - they will be displayed as a number indicating the number of unanswered messages.
Item “Transfer to group”
This item is displayed only for the group creator. Only the creator of the group can transfer the group to a public page (or public page) and vice versa. To do this, you will be asked for a code via SMS that will be sent to your phone.
You can transfer groups to public and vice versa no more than once a month, and only until the number of community members exceeds 10,000 people.
Add a document to the VK group. Documents on VKontakte
Hello, my new arrivals, as well as my dear readers!
Please note that in the menu on the left you should have the line “Documents”
, if it’s not there, then don’t despair, since everything can be easily fixed, you just need to go to “My Settings” -> “General” tab -> check the box next to the “Documents” column.
Everything is ready, now you have quick access to such a useful component of VK.
How to add documents to VKontakte
You can add the desired file either from a computer, phone, any bootloader, or from a storage device (most often a flash drive).
But just remember that what you upload to VK cannot weigh more than 200MB. With this, you no longer have to bother with e-mail if you suddenly need to send a presentation, document, or any other file to one of your family, friends, acquaintances, classmates (or anyone, in general). And then what you sent will not go down the drain, everything will be saved on the VKontakte social network service, so then you can send everything repeatedly as needed, again, to anyone.
You can also simply upload whatever you want for “memory” or future use (forwarding to someone or if you want to throw it to yourself/your friend/community/group on the wall). Click on “Documents” in the menu on the left, then click on “Add document”, after these simple maneuvers you will be asked to select where the desired file is located (computer or flash drive), after selecting it, click “Open”.
Well, that’s all, now it is permanently attached to the VKontakte social network system, of course, until the moment you delete it.
By the way, about deletion! Accidentally clicked and deleted a file? Do not panic and do not reload the page under any circumstances, but simply click on “Restore”, which will be located along with the inscription “The document was deleted” in the place where the file was.
The document returned to its place easily and simply.
When uploading a file, keep in mind that only the following formats are allowed on Vkontakte: doc, docx, xls, xlsx, ppt, pptx, rtf, pdf, png, jpg, gif, psd, mp3, djvu, fb2, ps.
Gif animation on VKontakte
Nowadays this is the only way messages, posts on walls, comments on VKontakte are replete with GIF animation, so how can you join the ranks of non-noobs?
I’ll tell you about this in as much detail as possible so that you don’t have to rummage through the information garbage that Google is now so rich in. You've probably already tried uploading a GIF animation as a simple image. And what happened? The animation turned into a regular picture. It would seem logical that it should be uploaded through this function, but the developers brought everything to the same documents in a roundabout way.
But you can outwit all this by doing it in a fairly simple way, only it concerns sending it to someone through messages, or posting on your wall (friend, community, group) and in the comments. To do this, on the Internet, find/select the animation you are interested in in gif format, right-click, select “Copy image address” in the context menu, and then simply click “Paste”, a second or two and the desired animated image is uploaded, you can send !
Now let's look at a slightly different way to load a GIF image. Poking around in our memory, we remember what I already wrote above about ordinary documents. So, my dear readers, go to “Documents”, which are still located in the menu on the left, click “Add document”, select (from a computer or media), click open and voila - you're done! Now you can share your downloaded GIF animation with any users of the VKontakte social network from time to time. But how? - you ask, and I will explain this to you now. Next to the response window, click on “Attach”, then select “Document”, you will immediately see a window with documents already filled in, but if suddenly none of the provided gif animations suits you, then you can click on “Upload a new file” ", and then select what you need from what is already on your computer/flash drive.
Search for Gif animations on VKontakte
If you still want to select from the list of uploaded files, but it is too huge, and you are frankly too lazy to bother with exhausting scrolling and searching, then go ahead and simplify your task by clicking “Search by documents” in the same window that opens. In the line that appears, enter at least a partial name of the required document, and it will immediately appear.
You can do absolutely the same thing in “Documents”, which is in the left menu, but only then you will already have the line “Search by documents” at the top. As you can see, nothing complicated
innovakon.ru
How to manage a group in contact if you are an admin, moderator or editor
First, you need to obtain the right to administer the community from the group creator.
To do this, the creator of the group must go to the group, click on the 3 dots under the cover or avatar of the group, and select “community management.” In the right menu, select the “participants” button. In the window that opens, assign any of the group members as a leader.
A window will open in which you must select the form of participation of the assigned group leader. This could be an administrator, editor or moderator. This window describes in detail what powers each type of manager has. The community administrator has the greatest authority.
An administrator can manage a group in much the same way as its creator. He will not have access only to the advertising account if it was opened by the creator of the group. But the creator of the advertising account can separately open access to it to any admin.
The second point is that the admin has no authority to remove its creator from the group and from the administration of the group.
The third point is that the admin will not be able to transfer the group to public and vice versa - this is the exclusive right of its creator.
Make a public group
In the public page, under the avatar there is an icon in the form of an “ellipsis”.
A drop-down menu opens at the bottom of which there is a “Transfer to group” button. A window also pops up with information about changes in the community after transferring the public to a group.
In my experience, changing the community type from public to group is completely painless for the content.
All entries, comments and of course participants remain in place.
Unfortunately, “Events” (if they exist) will definitely disappear. But this is not scary, because... they can be created as a separate community.
How to manage a group in contact from your phone
Managing a group in contact from your phone using the official application is somewhat difficult.
Many functions are not available there. If you still need this, you can access the VK website through a browser on your phone.
Go to your page and switch the contact interface to full mode. After this, the screen on the phone will display the window in the contact in the same way as on the computer.
To do this, click on the 3 lines in the upper left corner of the screen, a list will appear, scroll down, click “Full version”. That's all - now you can manage the group in contact from your phone.
I think you will be interested in these articles:
Proven Methods
No investment
I hope the article was useful to you, please rate it by clicking on the fifth star a little lower.
Thank you)))
Greetings! Come on, tell me, how many of you have thought about how to create a VKontakte community and monetize this enterprise? I am sure that among you there will be those who tried to become the owner of a profitable group on a social network, perhaps even filled it with content, worked on the design, but never achieved the popularity of their brainchild, failed to promote it. That is why I decided to devote today’s article to how to promote a VKontakte group from scratch. From my review you will get a lot of interesting information and learn about what needs to be done for the group to prosper
.
All the tips will be practical
, and you can immediately apply them without putting them into a long box called “Tomorrow”.
How to create a group in Contact and configure it correctly (Part 1)
Series of articles “How to create a group and configure it correctly”:
- How to create a group and configure it correctly (Part 1)
- Discussion block - how to change the location (center or left)
And so, you decided to create a VKontakte group, but you don’t know how to do it. I came to your aid