Each of the modern browsers has both functions for remembering logins and passwords, and options for cleaning lists with saved authorization data. But a total purge is not always required - quite often it is necessary to selectively delete some logins and their corresponding passwords, while preserving the rest of the list.
Instructions
1. In Internet Explorer, in order to delete one specific login and password, and not every list stored by the browser, you should go to the authorization page of the Internet source whose login and password you want to delete. In the authorization form, double-click the right mouse button and click on the login input field - this will open a list of logins . Using the up/down arrow keys, you need to go to the desired login in this list and delete it by pressing the Delete key. 2. In the Mozilla FireFox browser, to selectively delete logins and passwords, open the “Tools” section in the menu and click “Settings”. In the browser settings window, you need to go to the “Security” tab and click the “Saved Passwords” button in the “Passwords” segments. A window will open with a list of logins and their corresponding sites - select the desired login and click the “Delete” button.
3. In the Opera browser, to delete one or more logins and passwords, you need to open the “Settings” section in the main menu and click the “Delete personal data” item in it. This will open a window with deletion settings, which are in the collapsed list. To expand it, click “Detailed settings”. The list will expand, but what you need here is not it, but the “Manage Passwords” button - it opens a window with a list of web sources for which the browser has passwords. By clicking on the names of sites, you can expand lists of logins related to these sites, select the ones you need and delete them by clicking the “Delete” button.
4. In Google Chrome, to edit the list of stored logins /passwords, you need to expand the menu by clicking the wrench icon in the upper right corner. In it, select “Options” to go to the browser settings page. In the settings, you need the “Own Materials” page - a link to it is located in the left panel of the page. Among the settings for personal materials there is a button labeled “Manage saved passwords” - click it and a further page with the heading “Passwords” will open. Here you can select the necessary ones from the list of sites and logins and delete them by clicking the cross at the right edge of the selected line.
5. In the Apple Safari browser menu, you need to click the “Settings” item, and you can expand this menu in two ways - by clicking either the “Edit” section or the gear icon in the upper right corner of the browser. Among the tabs in the settings window, you need to prefer the one that says “Autofill”. In it, opposite the “User names and passwords” item, there is an “Edit” button - click it. This will open a window with a list of sites and their corresponding logins - select the necessary ones and erase them from the browser’s memory by clicking the “Delete” button.
All browsers have the option to save entered logins and passwords. This is very convenient because you don’t need to remember and enter this data every time. The downside is that anyone can sit down at your computer and go to your personal page without any problems. If there is a need to delete saved logins and passwords, it is not difficult to do this through your browser settings.
How safe is it to store logins and passwords in the browser?
When logging in for the first time on a website, Yandex.Browser offers to save confidential data. A pop-up window appears next to the data entry field. Further, the next time you visit this site, just focus the cursor on the input field and the browser will automatically fill in the fields. According to Yandex developers, storing personal data in the browser is absolutely safe, since the latest encryption system is used for protection. It cannot be cracked by any hacking program even in 100 years of continuous operation. However, profiles on social networks are often hacked, as a rule, this happens due to careless downloading of various free programs and utilities that contain malicious code, disabling anti-virus software, and ignoring warnings.
Why do you need to delete your saved password?
If you value your page, especially if you conduct commercial activities from it, we recommend that you definitely delete the saved key and login in Contact after logging into your account from someone else’s device. What can attackers do if they accidentally get hold of your saved secret code?
- They will assign a profile and begin conducting their illegal activities on your behalf;
- They will begin to distribute prohibited content, for example, extremist, pornography, scenes of cruelty, and create teenage groups with calls for destructive activities (including suicide);
- They will appropriate your groups and communities and use commercial data if you run a business in VK;
- They will create a dozen fakes and clone profiles, where they will sell all sorts of nonsense on your behalf, promote network marketing, or use it for other purposes;
- Hooligans can simply delete all the content of the page: photos, videos, products, music;
- Or send obscene or offensive messages to your contacts;
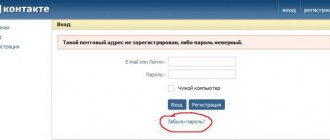
Are you scared? That's it, let's find out how to remove remembering the password in Contact in all known browsers. Along the way, we will explain how to disable the auto-save password function - useful for a work computer or for home (if you live with a bunch of relatives).
Removing passwords from Yandex Browser
If you accidentally saved your Odnoklassniki login information on someone else’s PC or if strangers have access to your computer, it is advisable to delete confidential information from Yandex.Browser. This can be done in three ways.
Depending on the settings set by users, access to this data may be limited by the master key; on Windows 8 or 10, you may need to enter your Microsoft account password or log into your Yandex account in the browser.
Method 1: Change or remove one password
- To remove or change the code from Odnoklassniki, click the button with three stripes in the upper right corner and click on the item “Passwords and cards».
- Find Ok.ru in the list - your login will be displayed Login If you have several OK accounts, this will help you avoid getting confused about which one to delete.
- Click on the login to open more detailed information about this account. Here we see the URL, login, authorization key and note. When you click on the eye icon, the password symbols become visible; by default, they are hidden by asterisks. As we wrote above, you may need to enter a master password or a Microsoft account key.
- Here we can change confidential data, after making changes we must click the “ Save ” button. Add a note and tags if necessary.
Method 2: Removing login and password
You can simply delete your login and password completely without opening detailed information. When you hover your mouse over a line, a checkbox becomes visible. Delete in the lower left corner . This action cannot be undone. This action cannot be changed after the page is reloaded.
Method 3: Removing all passwords and logins
In the same menu, in front of the list, click on the checkbox to mark all sites with one click, and click on the “ Delete ” button in the lower left corner.
In addition, there are programs that can be used to delete confidential information. Everyone knows the CCleaner program. Just before standard cleaning of your PC from garbage about and “ Saved passwords ” in the Google Chrome browser.
Don’t be surprised, this is exactly how Yandex Browser is displayed in CCleaner.
Features of the identifier when authorizing in Sberbank-Online
To enter the Sberbank web account, you need three combinations of characters:
- login(username);
- permanent password from your personal account;
- one-time password for logging in via SMS.
It would seem that without the third component it will not be possible to log in. But in reality this is not entirely true. Modern technologies make it possible to track data from cell phones. Many scammers can simply ask for a one-time code, taking advantage of the gullibility of their victim, or take possession of their mobile phone for a while. In short, bank clients should try not to provide any login information to their account.
How to disable saving passwords in Yandex browser
By default, the feature to save sensitive data is enabled. To ensure that the browser no longer offers to save your privacy data, these items can be disabled in the settings.
- Click on the button with three stripes and select the “ Passwords and cards ” section.
- Go to the tab "Settings».
- Here we uncheck the box “Offer auto-filling of forms”».
conclusions
To work with a bank client of Sberbank, you need to regularly enter a password and login. Many users, in an effort to simplify everyday operations, save this data to the browser's memory. The Sberbank security service categorically does not recommend doing this, since in this way the user significantly expands the circle of people who can use his web account and, accordingly, gain access to his funds.
If passwords have already been saved to your computer's memory, we strongly recommend that you delete them. Instructions for different types of software are provided in this article.
Mozilla Firefox
- To remove password saving in VK in Mozilla, you need to open the browser and click on the three horizontal stripes on the top right side of the screen;
- Select “Settings” and go to the “Privacy and Security” section;
- Scroll down the page to the “Logins and password” block;
- Go to the “Saved” tab;
- In the search bar, enter the name of the social network, then you need to delete the line that appears;
- If you uncheck the “Autofill” box, logins and secret codes will no longer be permanently saved.
Apple Safari
Let’s continue to study the situation when you have saved a password in VK and how to remove this information from someone else’s computer. Here's how to do it in the Safari browser:
- Open your browser and look for the gear icon at the top right;
- Find the item "Autofill";
- Inside you need a "Names and Password" section;
- Next to this block there is an “Edit” button, click;
- A list will appear in front of you in which you need to find and delete the saved key from VK.
- That's all.
Now you know what to do if VK remembers the password, and how to remove this secret information from a third-party device. We strongly recommend that you always check the “someone else’s computer” box in the authorization window. This action is guaranteed to prevent you from adding your code to the saved list.
As you can see, deleting a remembered password in Contact is not at all difficult - the most important thing is not to forget to do it. Remember, you alone are responsible for the security of your page.
We recommend never saving your VKontakte password if you log in from someone else’s computer or phone. If you suddenly receive an SMS with information that your account was logged in from an unknown IP address, and you know that it is not you, we recommend that you immediately go to your profile and change all security keys. Be careful!
Installing WordPress security plugins:
SF Author Url Control
So let's get down to business! Now you can start installing the necessary WordPress security plugins. First, install the SF Author Url Control . You can download it here.
This plugin creates beautiful links to author pages. Thus, you can hide the user login in URLs. After activating the plugin, all sorts of bad inscriptions will appear at the top.
We are warned that we need to install an additional plugin and configure some settings. We don't pay attention and move on.
Now install the SX User Name Security . You can download it here. It will hide the login in the source code and also automatically provide false data to hackers.
So, the plugins have been activated, now you need to configure SF Author Url Control. That is, to deal with the problem of displaying the login on the author’s page.
To do this, go to “Settings” -> “Permanent links“. At the very bottom in the additional settings you will see a new Authors page base (3).
You probably noticed that the author page goes like this: site domain/author/author login. If someone doesn't like the word author
, then in this setting you can replace it with your own.
For example, like this: website/first name/last name.
How to add a last name, read below. Personally, I left everything here empty. And for those whose registration is closed, you don’t have to touch anything here either. Anyway, when you uninstall the plugin, this setting will disappear and the word author will be displayed by default.
Therefore, I consider this function unnecessary beauty.
Now you need to go to your profile settings: “Users” -> “Your profile“. There, at the very bottom, a new Profile URL slug . In this window you will see your login (4).
I recommend removing it and replacing it with something else.
For example, write your first and last name in English letters. It will not only appear in the source code of the comments, but also in the url of the author's page, which is very nice.
SX User Name Security
Now let's talk about the SX User Name Security plugin. This plugin works with the body_class() function.
This function in the source code displays user data, namely the author’s login. She is also responsible for displaying the login on the author’s page. This is what I showed you earlier.
So, this plugin rewrites the function, thereby providing false data to prying eyes. As a result, instead of your real login, you will have what you typed in the box (4). Here is part of the source code of my post:
I decided to insert my last name in English in field (4). Now it (5) is displayed instead of the real login in the source code and in the address of the author’s page.
That’s it, now the author’s login is protected on the WordPress website.
I would also like to tell you about one useful function of the SX User Name Security plugin. The fact is that when registering a new user, the CMS itself displays the user name (login) in the “Nick” and “Display as” fields.
We are aware that this data needs to be changed. However, ordinary users may not know this. Therefore, for unenlightened people, the plugin automatically changes this data.
The figure shows that the plugin displays the left data in the “Nick” field. Also, if the user name is not specified, the module will automatically display the left name in the “Display as” field.
Thus, the real login will not appear on the site pages (in the commentator’s name). However, it is not immediately hidden in the source code and on the author's pages.
This is one of the disadvantages.
When a new user registers on your site, the following warning will pop up in his profile.
It says that the user login is used on the author page and in the source code. Next they offer a link to eliminate this shortcoming. But when a person clicks on it, nothing happens.
Its functions are limited. In his profile settings there is no Profile URL slug field in which you can change the name.
Therefore, this operation must be performed by the administrator himself. When he changes the data in this field, the warning will disappear. Therefore, if your site has open registration, then do not forget to edit the necessary settings for new users in time.
In general, the plugins are clear.
SF Author Url Control allows you to create a beautiful URL on author pages. And SX User Name Security hides the user's real login. It also displays the data specified in the settings of the previous plugin instead.
That is, plugins only work in conjunction. They cannot be used separately.
Deleting cookies
In some cases, you will also need to delete cookies. Let's look at the operating mechanism using the Opera browser as an example.
For this purpose, you need to enter the menu of the browser program in any of the ways (“Menu” - “Settings”, or alt-P or shift-ctrl-del) and go to the section responsible for privacy settings - “Privacy and Security”.
In this section you need to go to the “Clear history” submenu, in which you should indicate that cookies will be deleted.
After this option is selected, you need to click on the “Clear history” inscription. This procedure will remove the remaining settings of all active application components that can be launched on the page, with the help of which an automatic connection to the OK network could be carried out.
How to set a password on Odnoklassniki when logging in
The password for the OK social network is set by the user when creating an account. In fact, you won’t be able to create an account without it. Each time you log into OK, its security system will require you to enter data to identify the user.
In order for the system to request authorization data each time, it is necessary to answer “No” or “Never” when you first enter the OK interface when prompted by the browser to save them. In this case, each visit to the social network from this workplace will require constant manual authentication.

